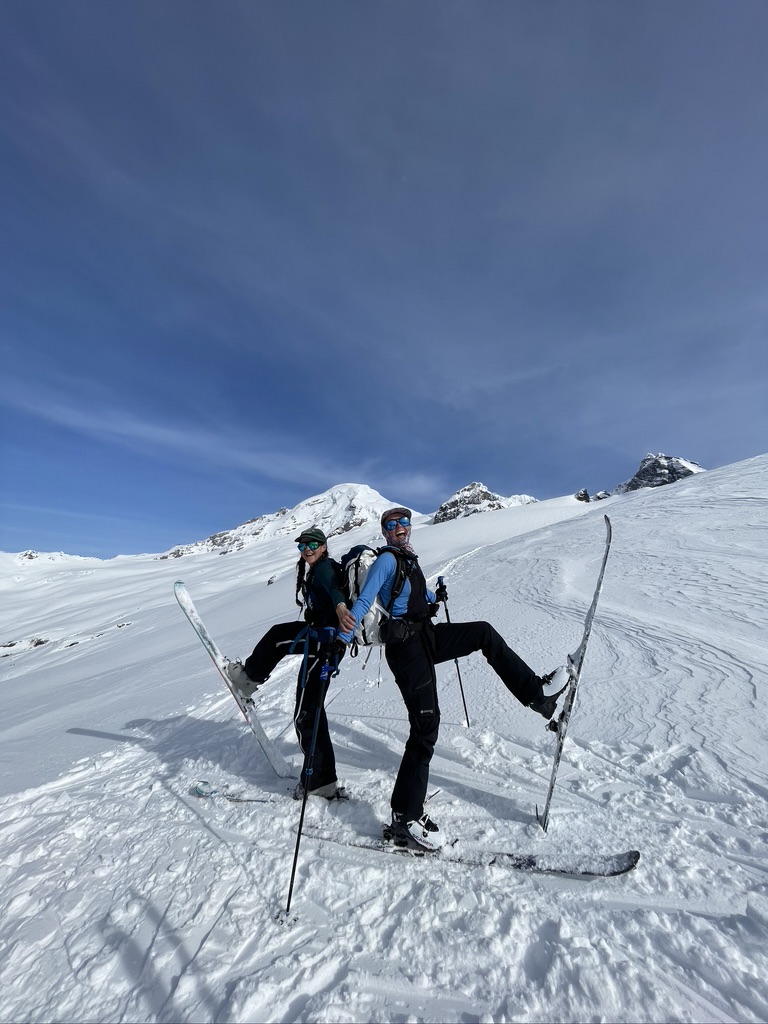
Intro to Ski-Alpinism-AKA Climbing & Riding in glaciated terrain
- 2026 4 Day Course Dates: April 10-13, 23-26; May 8-11, 22-25; June 5-8
- 2026 3 Day Course Dates: April 11-13, 24-26; May 9-11, 23-25; June 6-8
- Splitboard Specific Dates w/Zack Wentz: May 8-11, 22-25
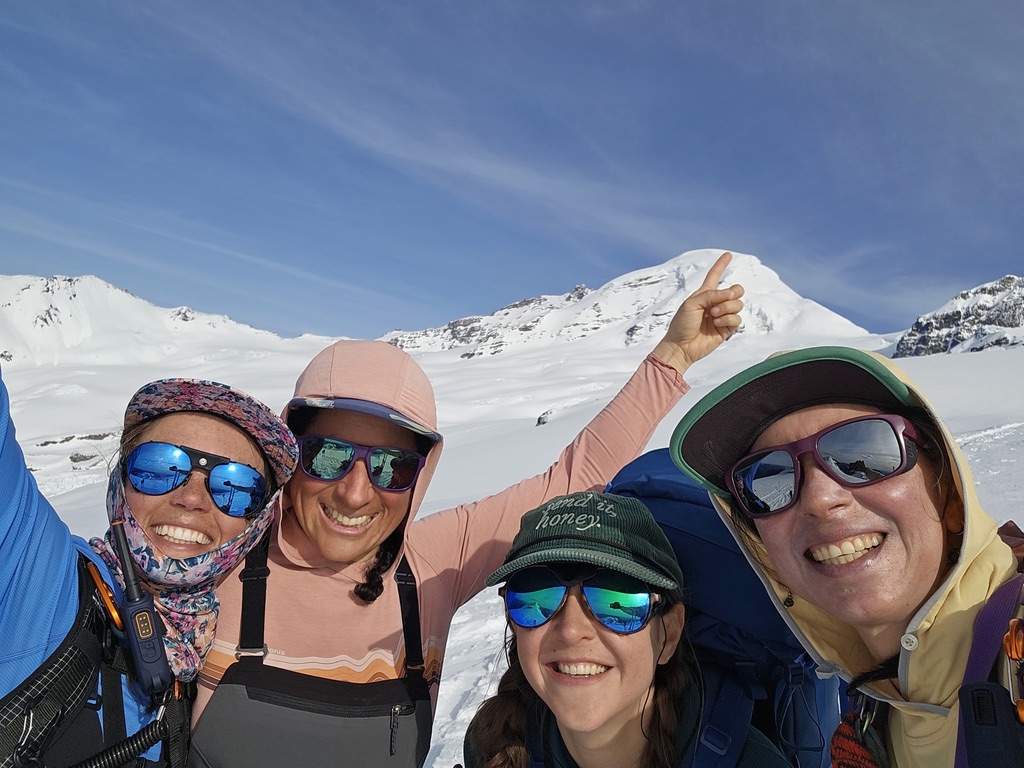
- Women’s Dates w/Juliana Garcia: May 8-11, 22-25
- Duration: 3 Days & *4 Days (Crevasse Rescue Included and can be scheduled separately)
- Level: Intermediate
- Client Ratio: 4:1
- Cost:– 3 Day $1155/4 Day $1355**(Also Combine 3 Day Course with 1 Day Crevasse Rescue @Snoq Pass)
- Included: All camp meals while on the mountain, tents, stoves, cook kits, group climbing equipment, and guide services
- Not Included: Airfare, transportation to trailhead, transportation within Seattle, hotel accommodations, restaurant meals,snack/lunch on the mountain, gratuities for guides, and all personal items. A detailed equipment list will be sent to all participants.
Book Course and Combo Online Now!
Book Women’s Program Here!
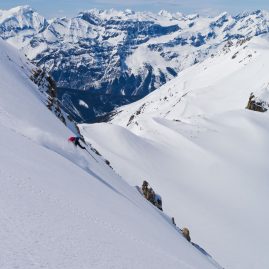
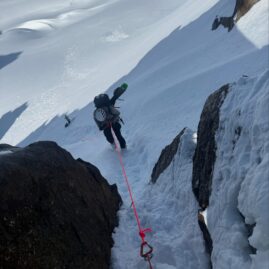
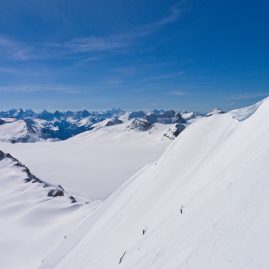
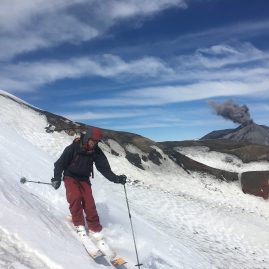
Intro to Ski Alpinism helps achieve dreams of riding off Baker, Rainier, Shuksan or just touring to Camp Muir. This popular course takes your touring into the high alpine; teaching the fundamental skills of snow, ice, glacier, climbing techniques for ascent and glisse-descent of glaciated mountains. You learn how to be safe, self-reliant ski-mountaineers ready to climb and ski locally or in the great ranges of the world. This course is truly an excellent foundation for any rider seeking independence in the alpine arena. Spend three to four days in the Coast Range of BC or the North Cascades where active glaciers, volcanic peaks, and breathtaking views create the ideal learning environment. A summit attempt on the last day of the course gives you the chance to put your newly developed skills to the test.
Course curriculum includes:
- Terrain management (safe, efficient, fast) w/ uphill track & downhill
- Snow climbing, ice axe positioning, and moving in balance
- Self arrest technique
- Snow and ice anchor selection, construction, and equalization
- Crevasse Rescue*(on all 4 Day Courses and an addon for 3 Day Programs)
- Crampon techniques
- Prussiking and team crevasse rescue practice
- Rappelling and rope management
- Glaciology and crevasse pattern prediction
- Navigation using maps, altimeters, and compasses
- Roped glacier travel and route finding through crevassed areas
- Mountain weather, alpine ecology, hazard assessment, and Leave No Trace Ethics
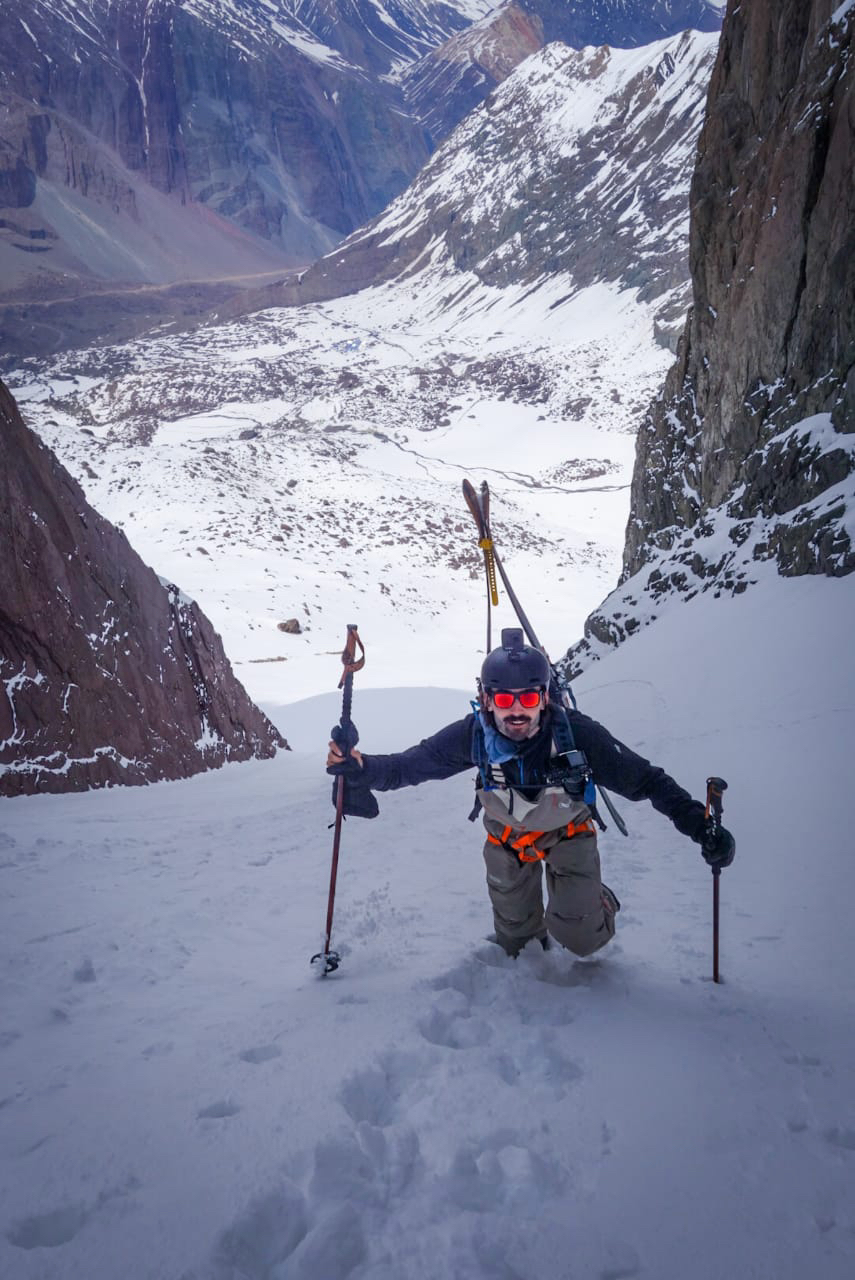
7:30am orientation. After an initial meeting and equipment check, we drive from Seattle to the trailhead and begin our hike to base camp. This approach is very strenuous and can take from 4 – 6 hours depending upon the particular approach and the fitness of the group. (This is where all of your training pays off!) You’ll skin through ancient forests and snow covered alpine meadows, enroute to our base camp. After establishing our camp, the remainder of the day will focus on the skills necessary for the proper use of an ice axe, traveling in balance, self-belay, self-arrest, placing various types of snow protection for use in the construction of snow anchors, as well as belay techniques. We hope to cap the day with a short evening ski run before dinner.
Day 2 5,200′ ↑ 1-2,000’~↓, 3~ Miles, 6 hours
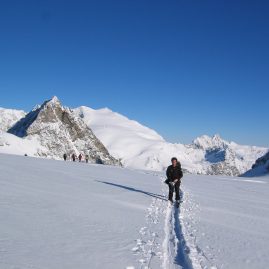
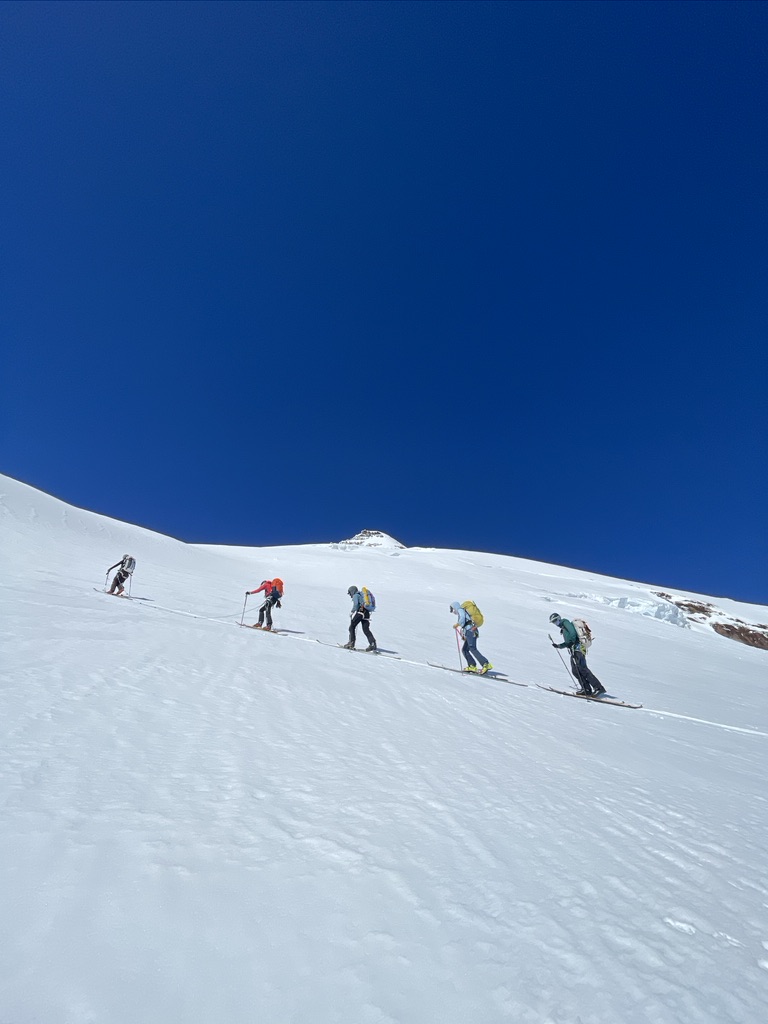
You will begin the day by learning crampon use and climbing steep snow and ice. We then focus on the skills required for safe and efficient glacier travel including roped travel and self-rescue (prussiking) techniques. This will include the means for each team member to correctly tie into the rope including the proper spacing of climbers based on the number of team members. We will cover the difference in traveling with skis versus snowshoes or crampons, ie when you need to rope up. After learning the proper techniques for traveling as a rope team, we will then make a short glacial “tour”, enabling us to practice and comprehend the day’s lessons. We follow that lesson up with a few runs before skiing back to camp. Discussions late in the day will focus on navigation with the use of map and compass.
Day 3 5,200′ ↑ 7-8,000’~↓, 12~ Miles, 8-12 hours
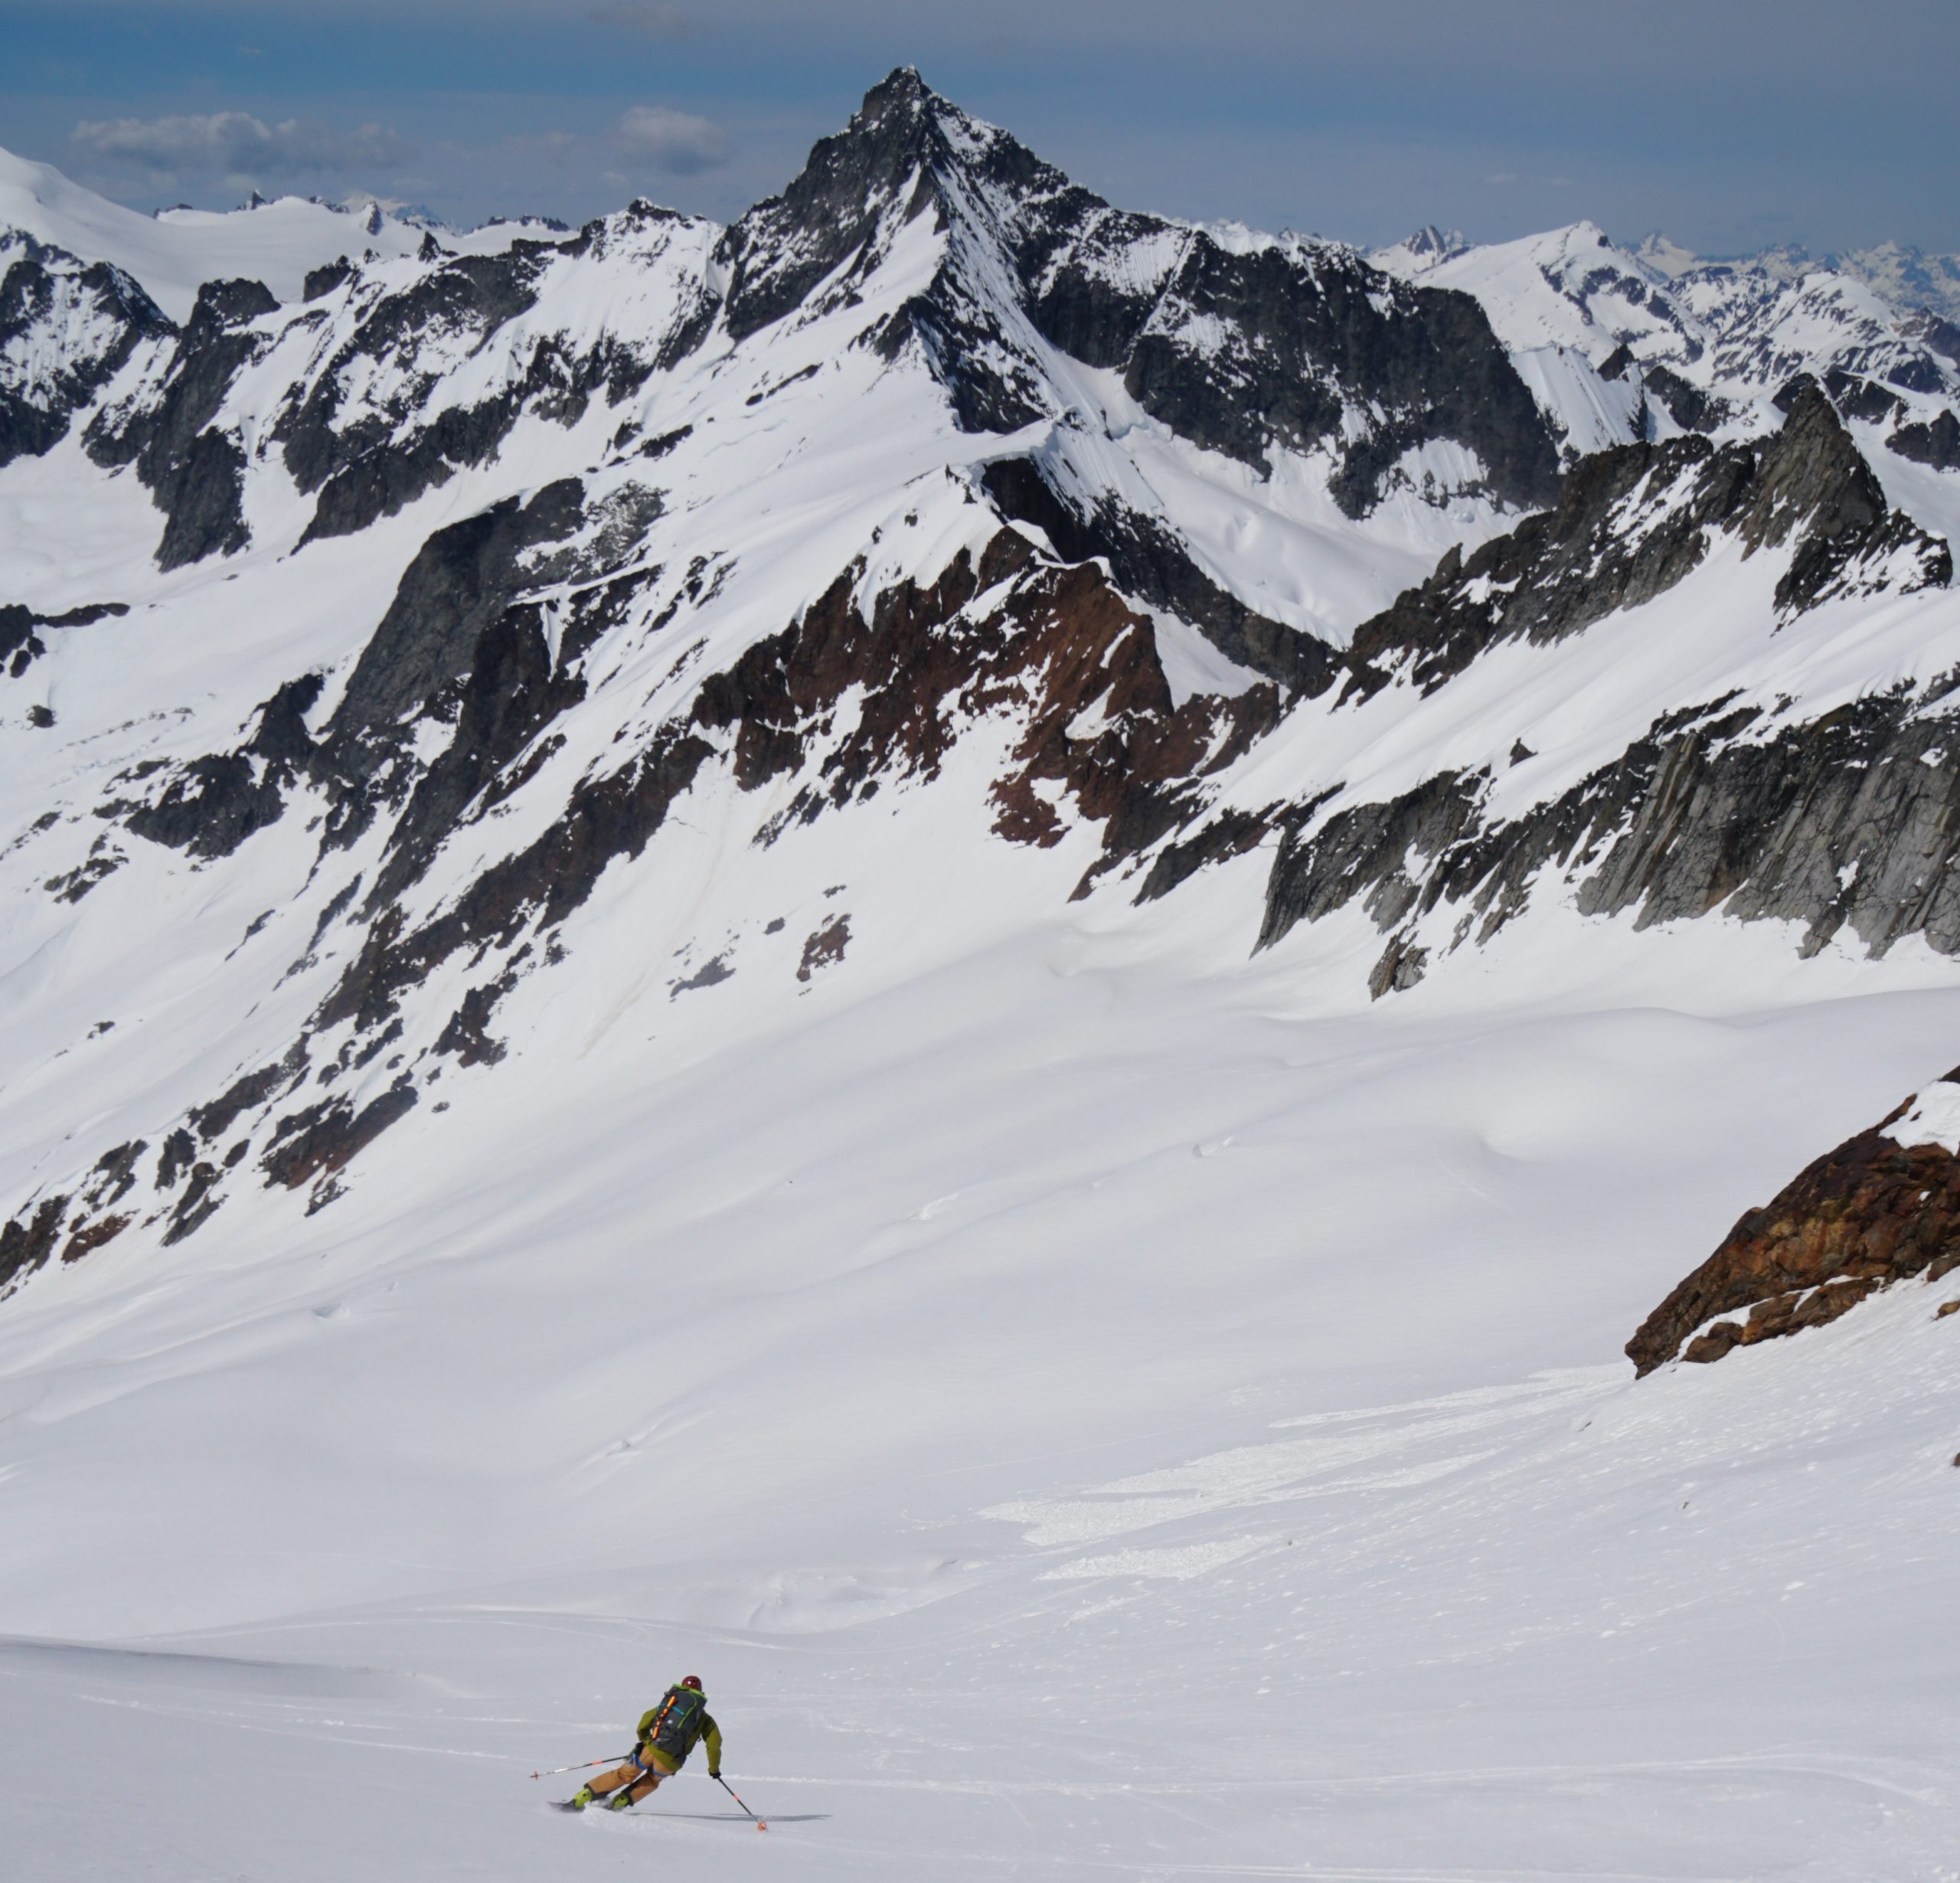
After a pre-dawn wake-up and a quick breakfast, we climb our way toward the summit. Today your group will apply the skills they have been practicing toward our ascent of a major glaciated peak. Depending on conditions and the pace of your group, it will take from five to eight hours to reach the summit. After enjoying the views and a snack, and absorbing your accomplishments, students will navigate and lead their team back to high camp, enjoying a well-earned glisse descent. We will celebrate a successful trip and begin planning the next climbing adventure.
6:30am orientation. After an initial meeting and equipment check, we drive from Seattle to the trailhead and begin our hike to base camp. This approach is very strenuous and can take from 4 – 6 hours depending upon the particular approach and the fitness of the group. (This is where all of your training pays off!) You’ll skin through ancient forests and snow covered alpine meadows, enroute to our base camp. After establishing our camp, the remainder of the day will focus on the skills necessary for the proper use of an ice axe, traveling in balance, self-belay, self-arrest. We hope to cap the day with a short evening ski run before dinner.
Day 2 5,400′ ↑ 1-2,000’~↓, 1-2~ Miles, 6 hours
You will begin the day by learning placing various types of snow protection for use in the construction of snow anchors, as well as belay techniques.crampon use and climbing steep snow and ice. We then focus on the skills required for safe and efficient glacier travel including roped travel and self-rescue (prussiking) techniques. This will include the means for each team member to correctly tie into the rope including the proper spacing of climbers based on the number of team members. We will cover the difference in traveling with skis versus snowshoes or crampons, ie when you need to rope up. After learning the proper techniques for traveling as a rope team, we will then make a short glacial “tour”, enabling us to practice and comprehend the day’s lessons. We follow that lesson up with a few runs before skiing back to camp. Discussions late in the day will focus on navigation with the use of map and compass.
Day 3 5,400′ ↑ 3,000’~↓, 7~ Miles, 5-8 hours
After a pre-dawn wake-up and a quick breakfast, we climb our way toward the summit. Today your group will apply the skills they have been practicing toward our ascent of a major glaciated peak. After enjoying the views and a snack, and absorbing your accomplishments, students will navigate and lead their team back to high camp, enjoying a well-earned glisse descent. We will spend the afternoon going over crevasse rescue then relax in camp for another night!
Day 4 5,400′ ↑ 3,000’~↓, 5~ Miles, 3-5 hours
We wake up and review Crevasse rescue techniques, including constructing and equalizing multiple anchor points and practicing rescue scenarios then descend to the valley where we will celebrate a successful trip and begin planning the next climbing adventure.
Day 0
Lake Louise:6:30pm orientation. After an initial meeting and equipment check, we grab dinner and get to bed early for tomorrow’s big day
Day 12,200′ ↑ 4,000′, 6 Miles, 4-6 hours
7:30 Drive to Peyto Lake (2,200’) after dropping off the vehicle on the other end of the tour. The tour gains 4,000’ in 6 miles to the Peyto Hut.4-6 hours. The remainder of the day will focus on the skills necessary for the proper use of an ice axe, traveling in balance, self-belay, self-arrest, placing various types of snow protection for use in the construction of snow anchors, as well as belay techniques. We will cap the day with a short evening ski run before dinner.
Day 26,200′ ↑492′ 984’~↓, 3.7~ Miles, 3-4 hours
From Peyto Hut the route ascends southwest onto the Wapta Icefield with Mount Thompson on our left (east) and Rhondda South on your right (west). Ski descents along the route are plentiful. With St. Nicholas in your view dead ahead you will eventually loose elevation and can ski down with towards the Bow hut with St. Nicholas on you right. The tour will be 3-4 hours covering 3.7 miles gaining 492ft, descending 984ft.
While traveling we will learn crampon use and climbing steeper snow and ice. We then focus on the skills required for safe and efficient glacier travel including roped travel and self-rescue (prussiking) techniques. This will include the means for each team member to correctly tie into the rope including the proper spacing of climbers based on the number of team members. We will cover the difference in traveling with skis versus snowshoes or crampons, ie when you need to rope up.
Day 35,700′ ↑ 1,000’~ 1,000’~↓, 4~ Miles, 3-5 hours
We will spend the first half of the day skiing one of the many objectives of Gordon, St Nicholas then in the afternoon; go over crevasse rescue then relax in the comfort of the Bow Hut for another night!
Day 45,700′ ↑1,900′ 1,410’~↓, 4.3~ Miles, 4-5 hours
Bow Hut to Balfour Hut starts with a steep 1000′ climb up the Wapta Glacier heading west of the Bow hut. Our route offers multiple route options. Ascend the St. Nicholas Peak-Olive col and then ski down the Vulture Glacier. The second option ski tour around the East side of St. Nicholas Peak until you reach the west side of the St. Nicholas Peak-Olive col then ski down the Vulture Glacier to the Balfour hut.
.
Day 55,400′ ↑ 1,700′ 3,900’~↓, 6.2~ Miles, 5-6 hours
Balfour Hut to the road can go back by the Bow hut or past the Scott Duncan hut. Exiting via the Scheisser/Lomas route takes us up and over the Balfour High Col, the crux of the Wapta traverse. Exposure to avalanches, ice fall and crevasses. require good weather to gain the upper reaches of the route where things will mellow out a bit and take you away from icefall danger off of Mount Balfour. Ski tour across the High Col till we can remove skins and ski down the Wapituk Glacier toward Mount NIles using the Scheisser/Lomas route which is an 11km ski tour to the West Louise Lodge. The descent of 3,900ft takes 5 – 6 hours to complete and in bad weather can be quite challenging. After a few kilometers from the hut, you will come to a small peak go to the right of this and descend down to the westerly shoulder of Mount Niles. Ski through the trees a short distance until you find Sherbrook Creek bed and then follow this out to Sherbrook Lake and cross it to the far end. Ascend the slope on your left and begin searching for the summer trail or remnants of ski tracks which will lead you east around the shoulder of Paget Peak to the West Louise Lodge on Highway 1 a few kilometers away.
Our recommended clothing system has four layers.
- Base layer: manages moisture and wicks perspiration away from your skin. (Polypro, capilene, driclime)
- Softshell: should be a durable, comfortable, insulating and wind/water resistant layer that breathes well.
- Hard shell: windproof, waterproof and breathable. (e.g. Gore-Tex, or similar)
- Insulating layer: should be down-fill or synthetic-fill and fit over all layers. (e.g. down, primaloft or polarguard)
These four layers are usually sufficient for most people, but if you tend to be colder bring one extra medium-layer that would be ideal for extra warmth around camp, such as a vest. When deciding what to pack, remember to bring enough clothes and accessories to ensure your safety and comfort, while not over-burdening yourself with items you probably won’t use.
Climbing/Ski Gear
- Adjustable Ski poles with powder (big) baskets*
- Skis or splitboard.Skis should be equipped with alpine touring bindings or telemark bindings. We prefer splitboards w/ skins.
- Alpine touring, telemark, or snowboard boots
- Skins with glop stopper (skin wax)
- Avalanche Beacon This needs to be Triple Antenna.
- Shovel Small collapsible style
- Avalanche Probe 265cm or longer
- Helmet for riding and climbing adjustable to fit over hats
- Ski Crampons Required for all ski mountaineering trips
- Alpine climbing harness Must have adjustable leg loops and fit over all clothing and can be put on with ski boots
- Ice axe Lightweight
- Crampons with anti-ball plate Must be fit to boots prior to trip,
- Climbing/ski helmet Adjustable, should fit with hat on
-
Crevasse Rescue Equipment Kit*:
-
4 locking carabiners Large, pear-shaped carabiner is best, screw gate type recommended
-
4 regular carabiners (e.g. small wire gate are recommended)
-
1 double length sling
-
1 single length sling
-
! Cordelette 6 mil 18-20’(6-7 meters)
-
1 12” Prussik or Hollow Block*
-
1 Microtraxion & Tibloc*
-
Upper Body

-
- Lightweight base layer T-shirt or long sleeve polypropylene shirt
- 2 synthetic sports bras*(WOMEN)
- 1 long sleeve Sun Hoodie Lightweight, light colored for sunny days
- Soft Shell
- 1 Down/synthetic jacket with hood
- 1 Hard shell jacket with hood Waterproof and breathable. roomy enough to fit over multiple layers.
- 1 pair liner gloves Thin wool or polypropylene
- Shell gloves or mitts
- Warm hat Wool or synthetic
- Balaclava or Buff
- Shade hat or baseball cap
Lower Body
- 2 heavy wool/synthetic socks Check boot fit with liner and wool socks on
- 1 pair lightweight long underwear Polypropylene or Capilene
- 1-2 pairs of underwear boxers/briefs
- Soft shell pants
- Shell pants Waterproof/breathable with full side zips
Sleeping Gear
- Sleeping bag Rated to at least 20º F. Line the stuff sack w/ plastic bag.
- Sleeping pad 1 closed cell foam and Air mattress/Neo-Air for extra warmth and comfort.
Backpack
- Internal frame pack 3500-4500 cubic inch capacity able to carry snowboard/skis
Hut Clothes*
- lightweight booties or slippers, comfortable top and bottom-cotton optional.
Miscellaneous Equipment
- Goggles and Sunglasses 100% UV protection with side shields or wrap around.
- Personal first aid repair kit Basics: moleskin/blister kit, Band-Aids, first-aid tape, ibuprofen, personal medications, spare parts for bindings and batteries etc.
- Lip balm At least SPF 20
- Sunscreen At least SPF 40
- Headlamp lightweight LED
- 2 water bottles 1 liter wide-mouth Nalgene and 1 bottle holster, or
- Hydration bladder With drinking tube and 1 Nalgene bottle
- Bowl and spoon Plastic, small Tupperware works well. Lexan spoons are best.
- Multi-tool
- Toiletry kit Be sure to include a WAG Bag or toilet paper stored in a plastic bag.
- Bandana
- Hand wipes
- 1 small stainless steel thermos (Optional)
- Favorite snack foods (no more than 2 pounds)
WILL MY GUIDE (OR GUIDES) BE?
You will receive an introductory email with the instructor for your course. We are small company who enjoy working together in the mountains as well as highly skilled professionals who hold current Wilderness First Responder certification and are proficient in technical rescue and evacuation skills. Our guides are dedicated to the world of alpinism, many having first ascents and hold professional certifications with AIARE & AMGA. The AMGA is part of the IFMGA, which is the international body of certified mountain guides.
HOW MUCH SHOULD I TIP MY GUIDES?
Tipping is considered standard practice in the guiding industry. Tipping amounts vary – so $20-30 per day per person/per guide is average that works well for the guides without a serious blow to your wallet. Often 10% of the course cost is a good rule-of-thumb. If you feel that the program was exceptional or substandard the tip can reflect that.
CAN I RENT EQUIPMENT FROM BCAG?
No, we recommend renting from Cripple Creek where they have a full selection of rentals.
HOW HEAVY WILL MY PACK BE?
You will carry 30-40 pounds, which will include everything on the equipment list.
WHEN DO I NEED TO PAY THE BALANCE OF MY TRIP?
For Scheduled Domestic Courses and Climbs: Your balance is due 21 days from trip departure.Payable when you make your reservation by check, or credit card.
WHAT HAPPENS IF I NEED TO CANCEL MY TRIP?
If you should decide to cancel your trip, BCAG must be notified in writing. Your trip will be cancelled from the date we receive written notice. You will be assessed a cancellation fee according to the following schedule:
90 to 22 days from trip departure – 50% of trip cost
30 days or less – 100% of trip cost
WHAT HAPPENS IF I WANT TO CHANGE THE DATES OF MY TRIP?
Schedule changes are subject to a $50 fee per person up to 2 weeks out and $100 less then 14 days from the start of the trip and may not be possible. If conditions or circumstances preclude running a scheduled program we reserve the right to make the decision as to whether the program will be canceled, rescheduled, or an alternative provided.
WHAT HAPPENS IF BC ADVENTURE GUIDES HAS TO CANCEL MY TRIP?
In the rare circumstance where we need to cancel a program you can reschedule without a fee or receive a refund on your deposit. If circumstances arise that force us to cancel a program that is already in progress we reserve the right to decide whether a refund or credit, at a prorated rate, will be issued. We are not responsible for cancellation fees or costs arising from your changed or cancelled flights, lodging, or other arrangements. We strongly recommend obtaining trip cancellation insurance from your travel agent.
DO I NEED TO PURCHASE TRIP INSURANCE?
BCAG highly encourages the purchasing of trip cancellation and travel insurance on domestic trips and requires it on international trips. Europeans and Canadians use it because travel insurance provides coverage for trip cancellation and interruption, travel delays, loss of baggage and travel documents, baggage delays, medical expenses and emergency assistance. To avoid any financial hardship that an unexpected cancellation or interruption could cause,
Trip Cancellation/Interruption costs about 5% of your trip cost and it’s worth the peace of mind! If you find that you are not already covered for any of the above circumstances you have options!
BCAG has an account with Global Rescue, the world’s leading membership organization providing integrated medical, security, travel risk and crisis response services to our travelers worldwide. They can provide you with medical and evacuation coverage.
https://partner.globalrescue.com/bcadventureguides/index.html
WHEN SHOULD I PLAN TO LEAVE A RETURN HOME?
We often get this question because most people need to know how much total time they need to take off work. Our Northwest trips begin at 6-7 am in Seattle on the first date of your trip. Therefore, you will want to arrive the day before your climb or course begins. Our return to Seattle on the last day typically extends into the early evening with the descent and drive back. We suggest you make a hotel reservation for the night of the last day or a late red eye flight to return home on the day following the end of your course or climb.
WHAT IF I WANT TO ARRIVE EARLIER OR DEPART LATER THAN THE TRIP DATES?
No problem. There is a lot to see and do in the Seattle area and we would be happy to recommend our favorite attractions, restaurants, and day trips.
WHERE SHOULD I STAY IN SEATTLE?
There are many other hotels nearby to choose from as well and suggest one that includes parking and possibly north of downtown.