


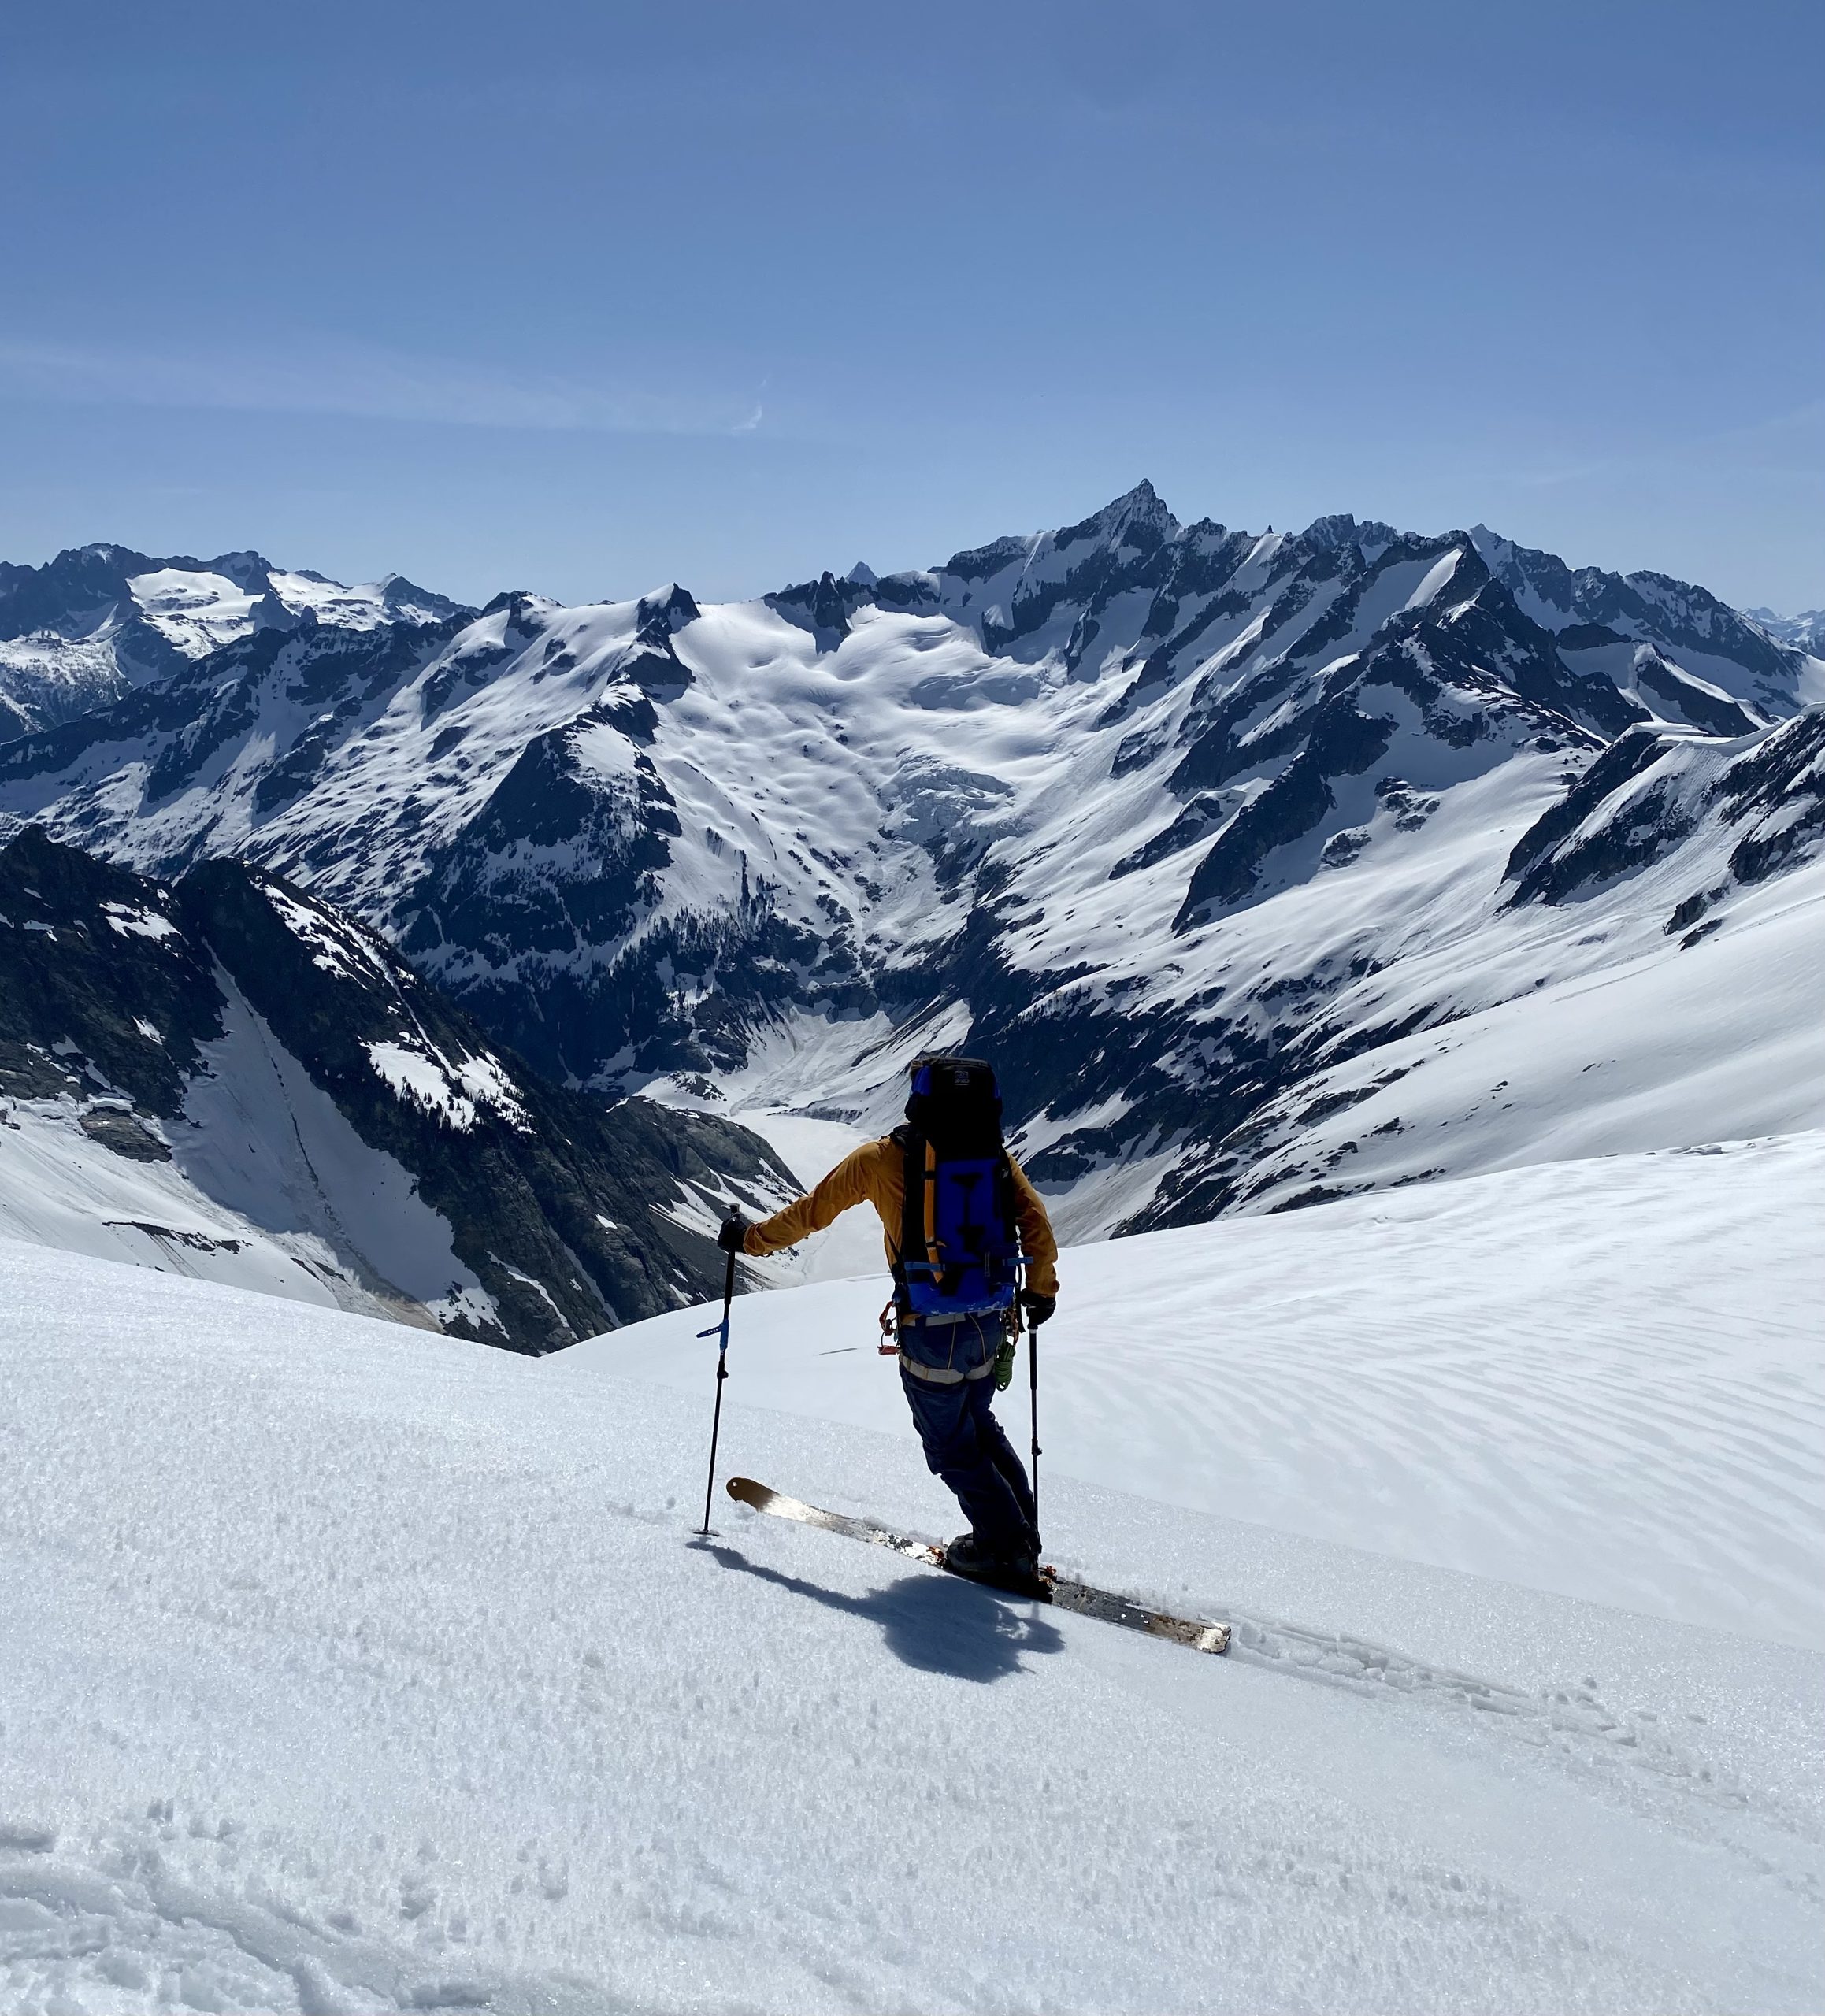
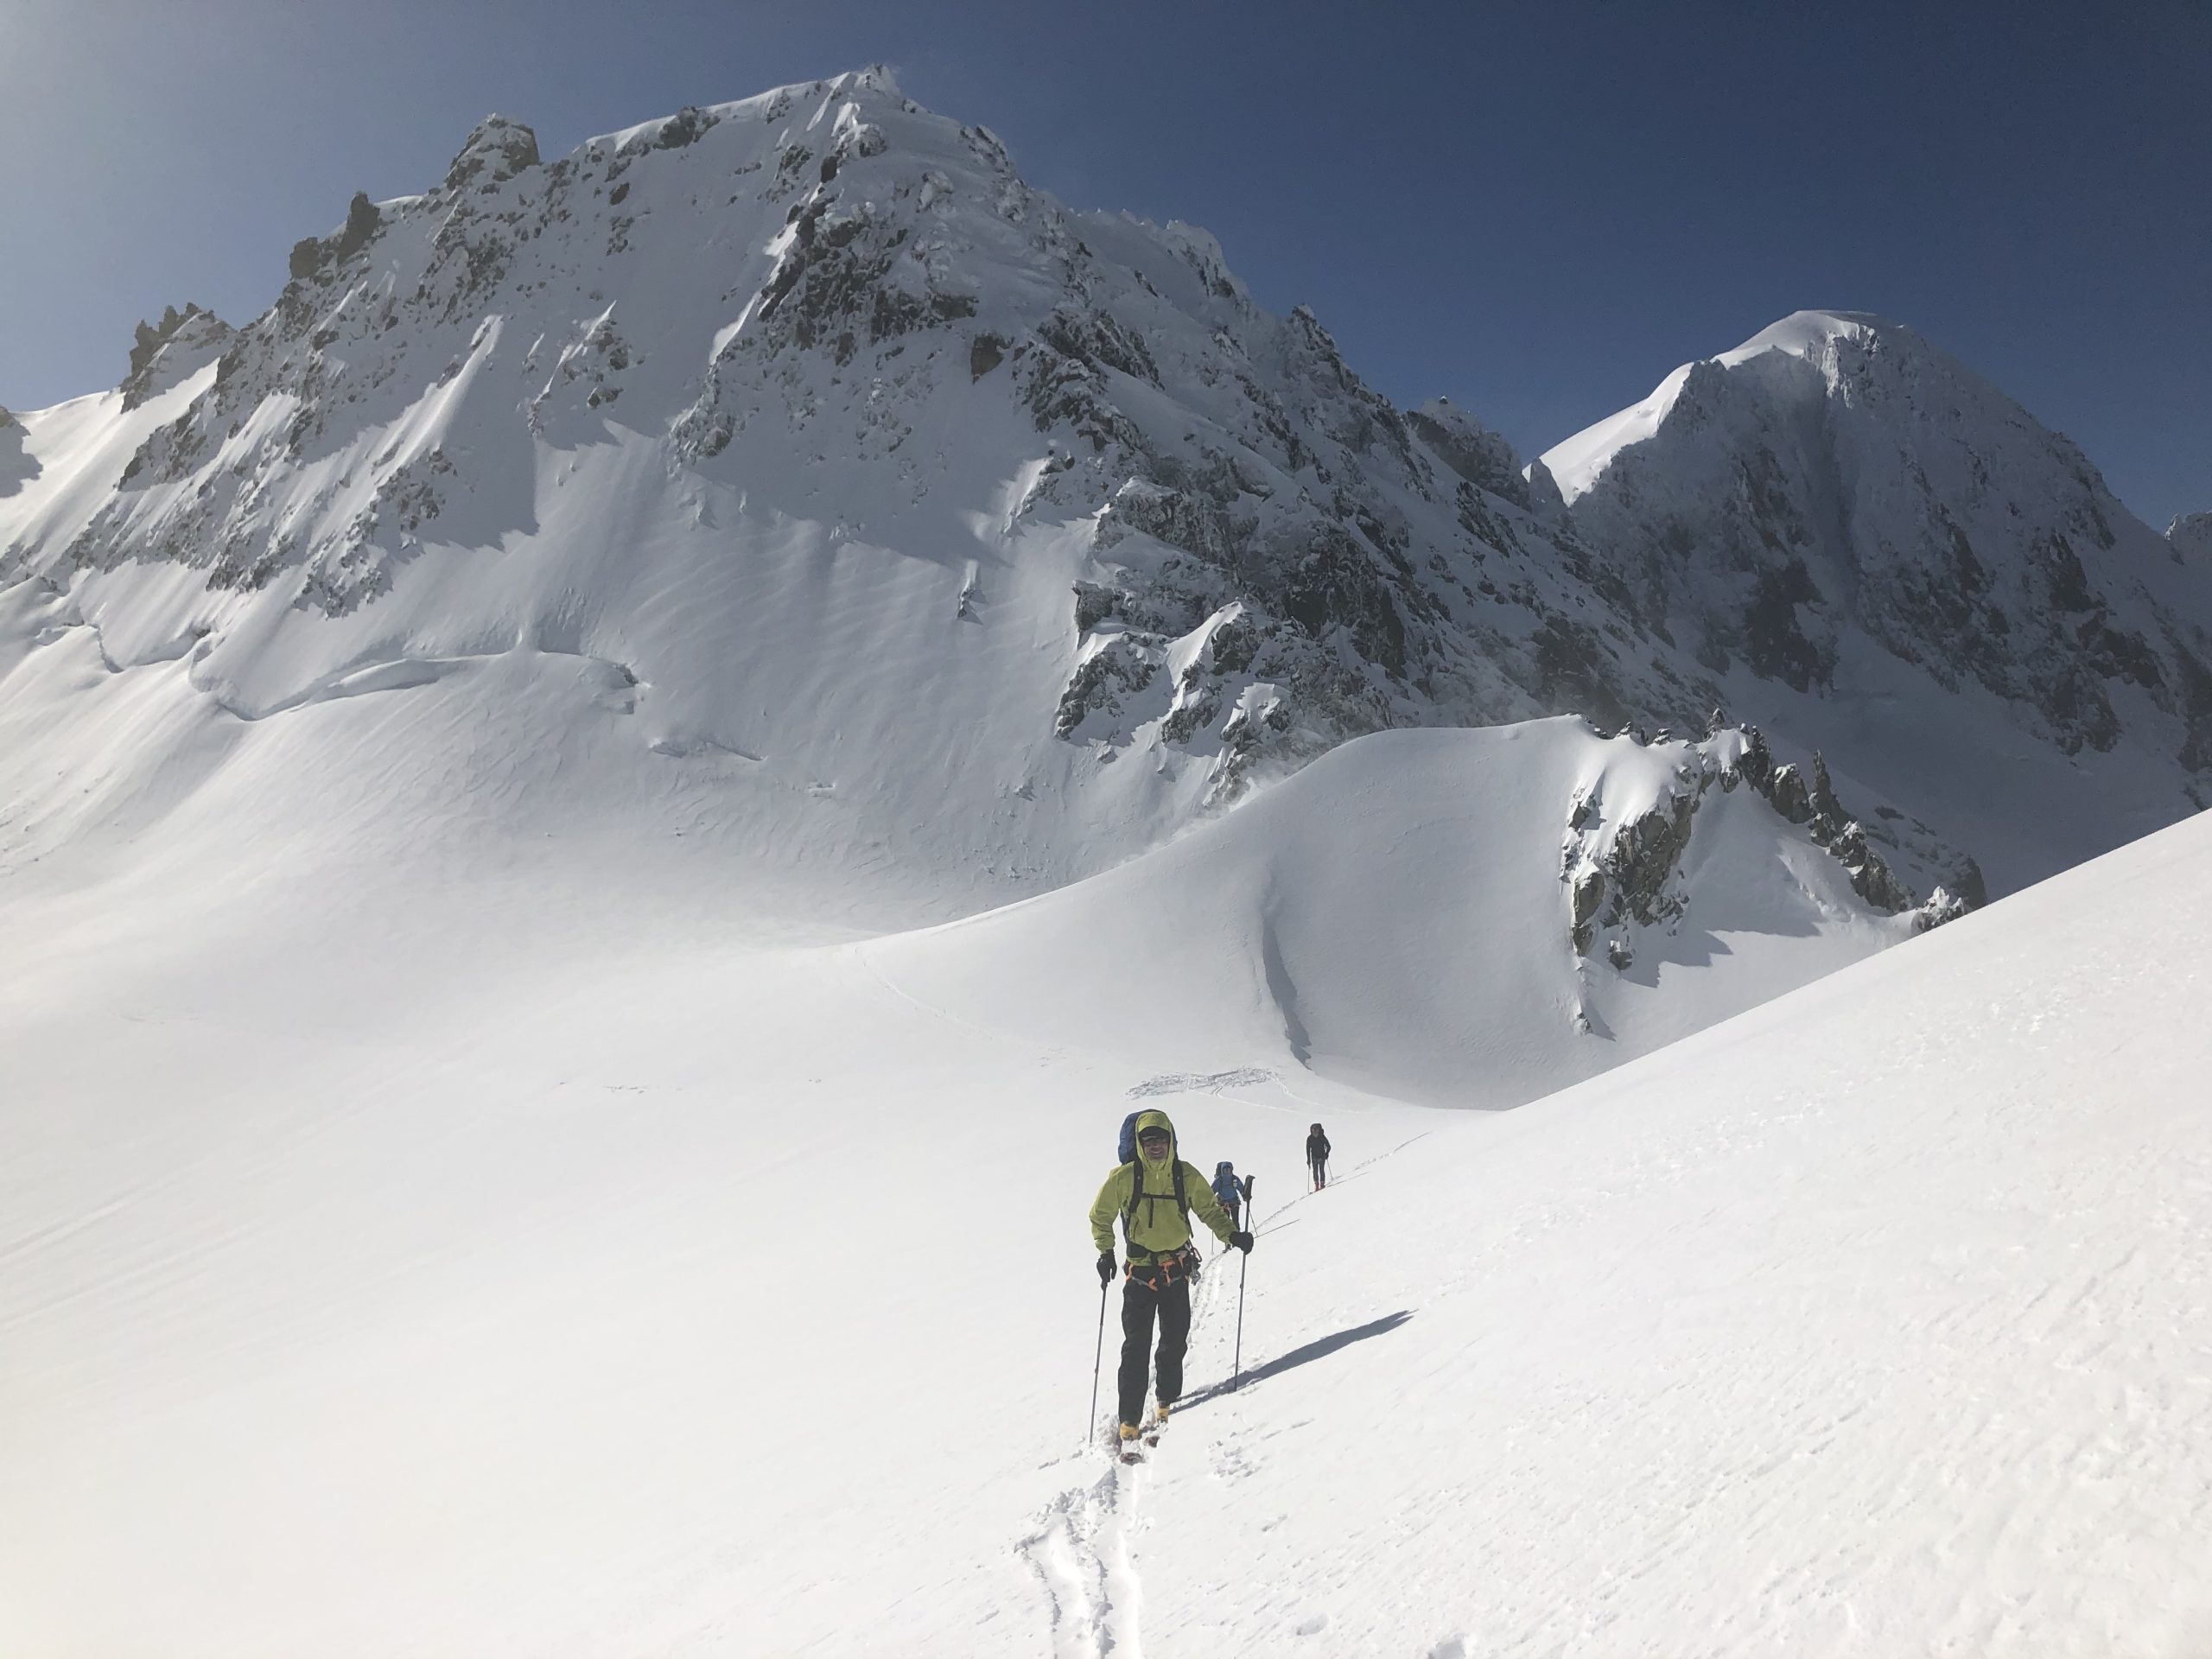
The Isolation Traverse is one of the most exceptional ski mountaineering objectives in North America, combining sustained fall-line skiing, dramatic alpine terrain, and a sense of wild remoteness rarely found elsewhere. Unlike many traverses that prioritize mileage over turns, the Isolation is packed with quality descents—glaciated bowls, steep headwalls, and long rolling runs that flow naturally from one drainage to the next. Starting from the flanks of Eldorado Peak and weaving through the heart of the North Cascades to Snowfield Peak, each day delivers a new aesthetic line, all framed by jagged granite peaks, yawning glaciers, and vast wilderness. It’s a traverse that rewards strong skiers with not only technical challenge and navigation, but with some of the best turns of their season—making it a true classic in the world of ski mountaineering.
- Dates: 2026 May 2-5 & Custom
- Duration: 5-days
- Level: Advanced
- Client Ratio: 4:1
- Difficulty: Difficult
- Cost: $1,695 Minimum 2 people
- Included: Park fees, group climbing equipment, and guide services.
- Not Included:Ground transportation airfare, transportation within Seattle, hotel accommodations, restaurant meals, gratuities for guides, meals while on the mountain, and all personal items

5-Day Itinerary – Isolation Traverse (Eldorado to Snowfield Peak, North Cascades Ski Traverse)
Day 1 – Hike to Eldorado High Camp 5,300′↑ ~4.5 miles, 5–7 hours
Begin at the Eldorado Creek Trailhead (~2,200 ft) and ascend steeply through dense forest to cross Eldorado Creek via a large log. Climb up slabs, talus, and open heather benches before reaching the toe of the Eldorado Glacier. Continue onto the glacier and ascend to high camp at ~7,500 feet, perched with jaw-dropping views of the Inspiration Glacier, Forbidden Peak, and the heart of the North Cascades.
Day 2 – Ski Across the Inspiration Glacier to the McAllister Glacier and Dorado Needle Vicinity 2,000′↑ 2,500′↓ ~6 miles, 6–8 hours
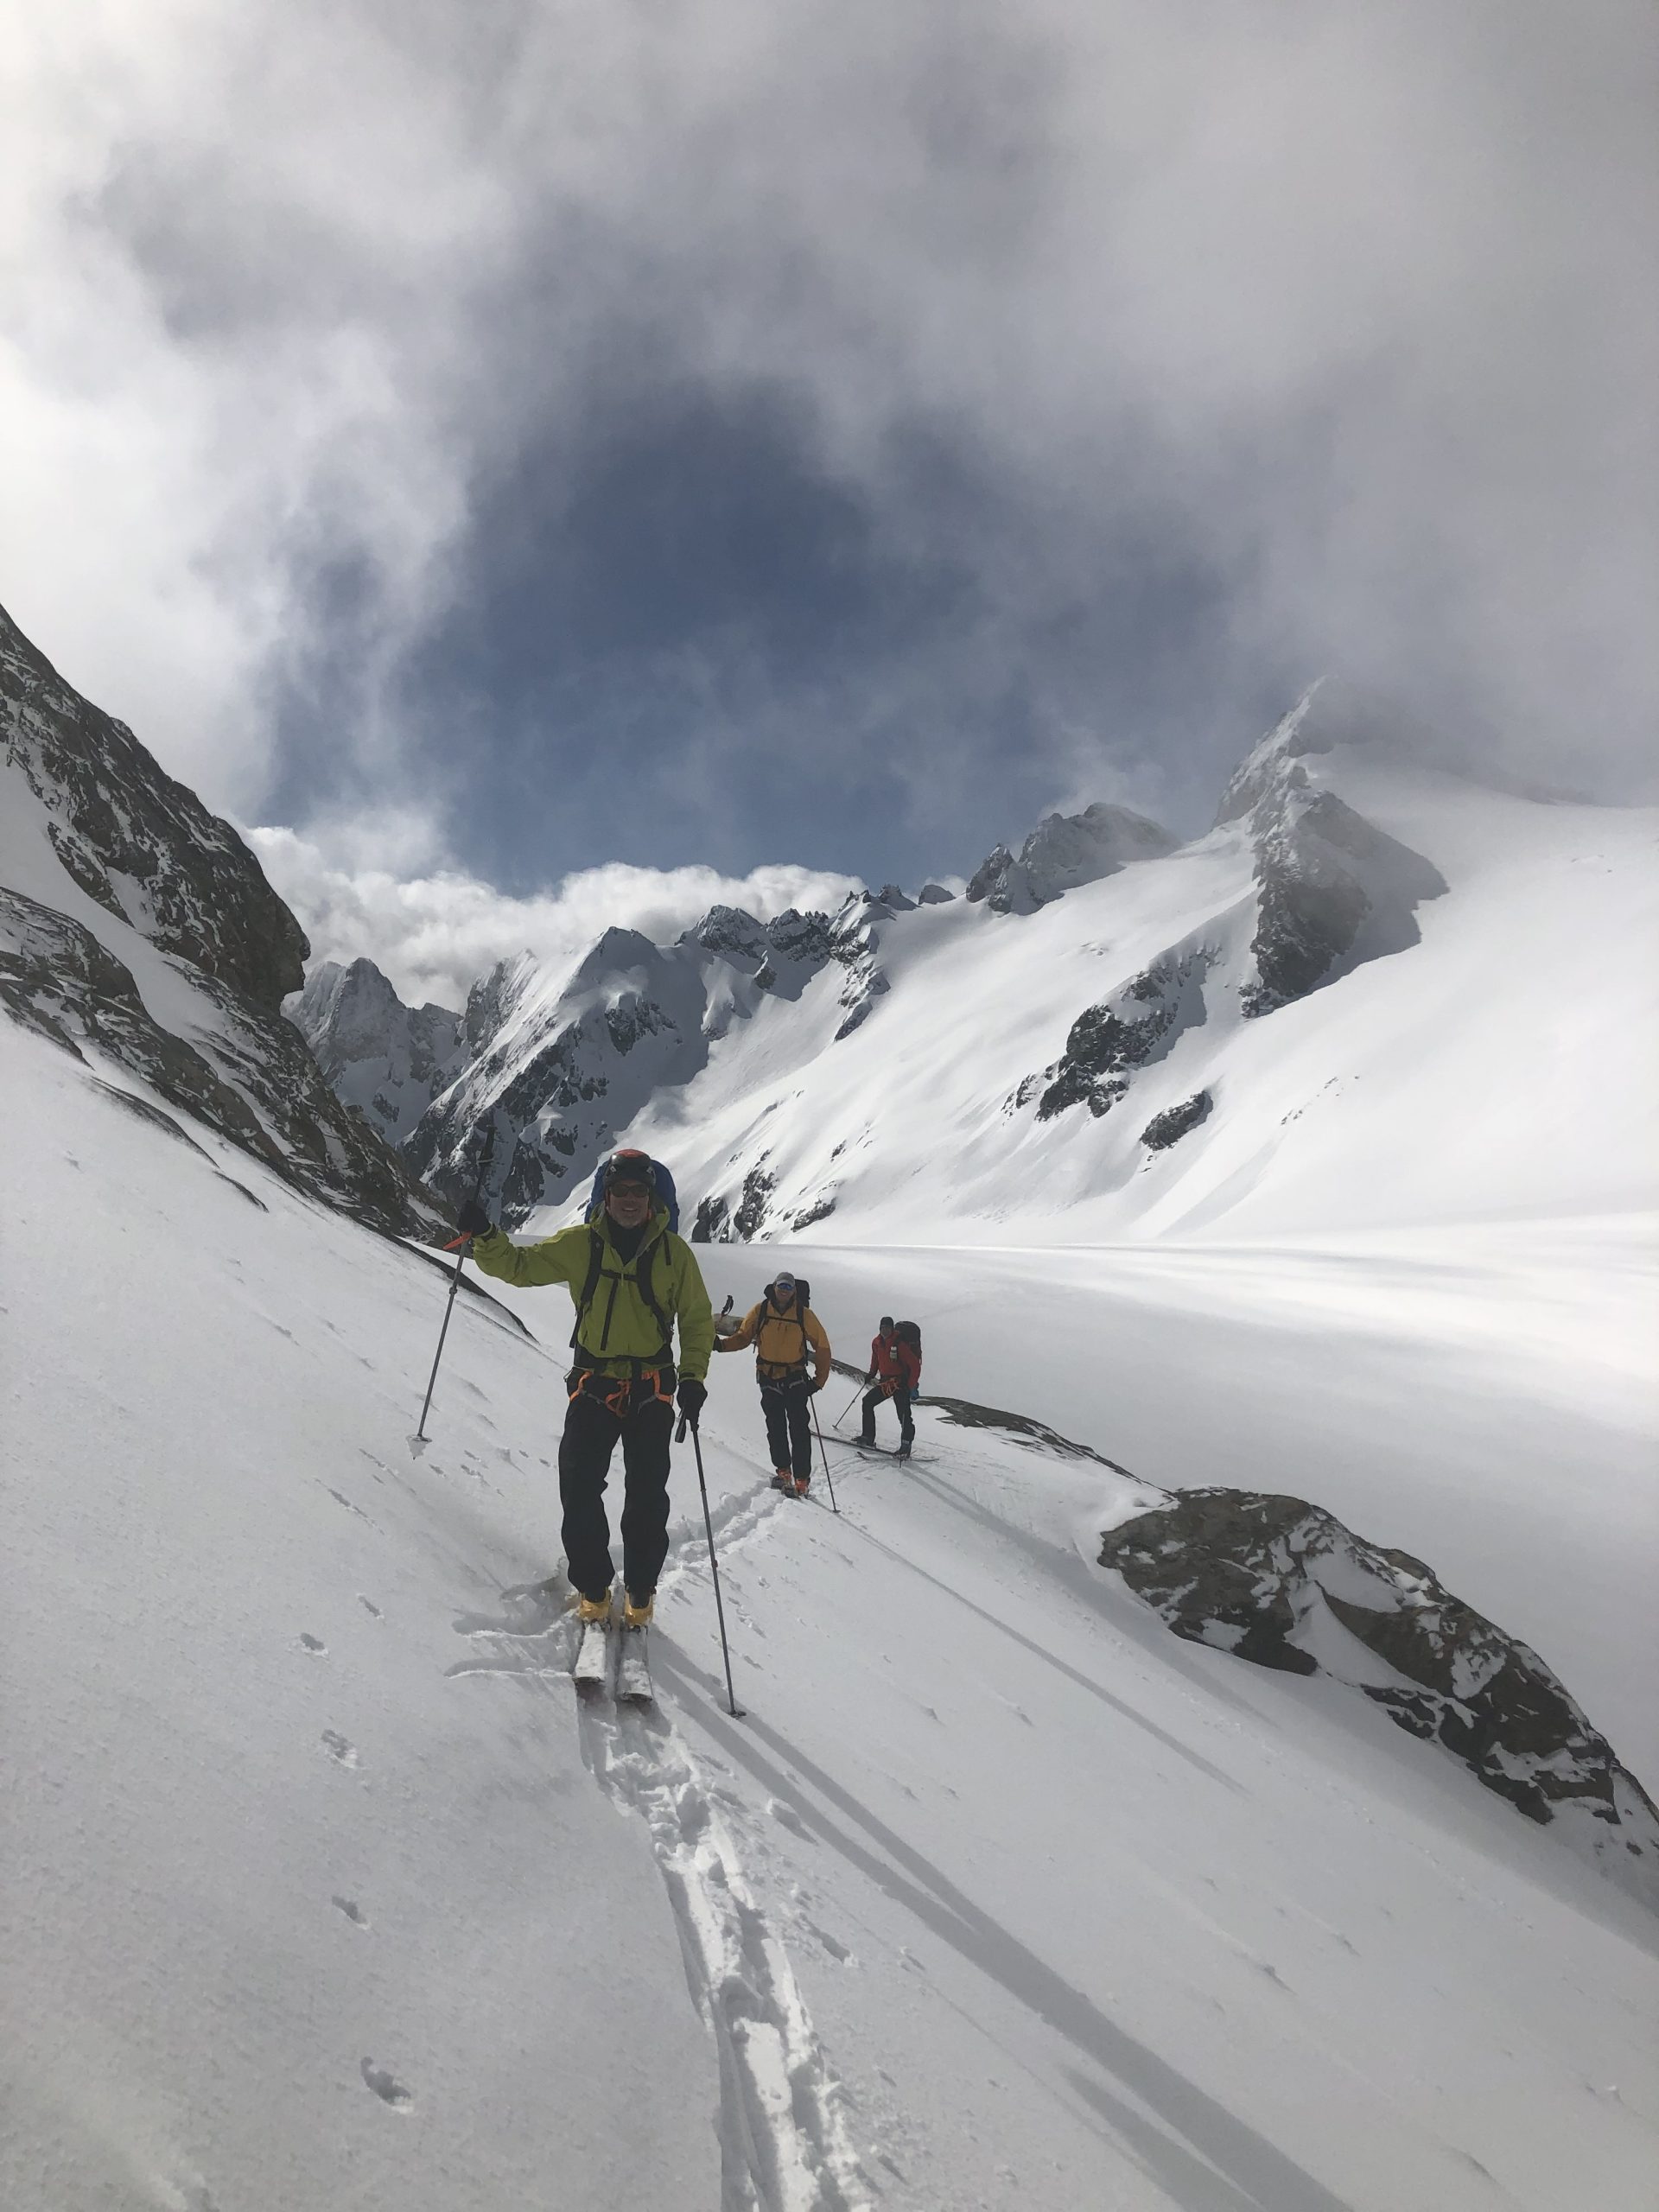
Start the traverse by skiing across the upper Inspiration Glacier, passing below Eldorado Peak. Drop down and contour around to the McAllister Glacier, navigating through complex terrain and under the flanks of Dorado Needle. This day typically includes both skinning and short ski descents, with crevasse navigation and big alpine scenery throughout. Camp is often made near the base of Dorado Needle or higher on the McAllister Glacier.
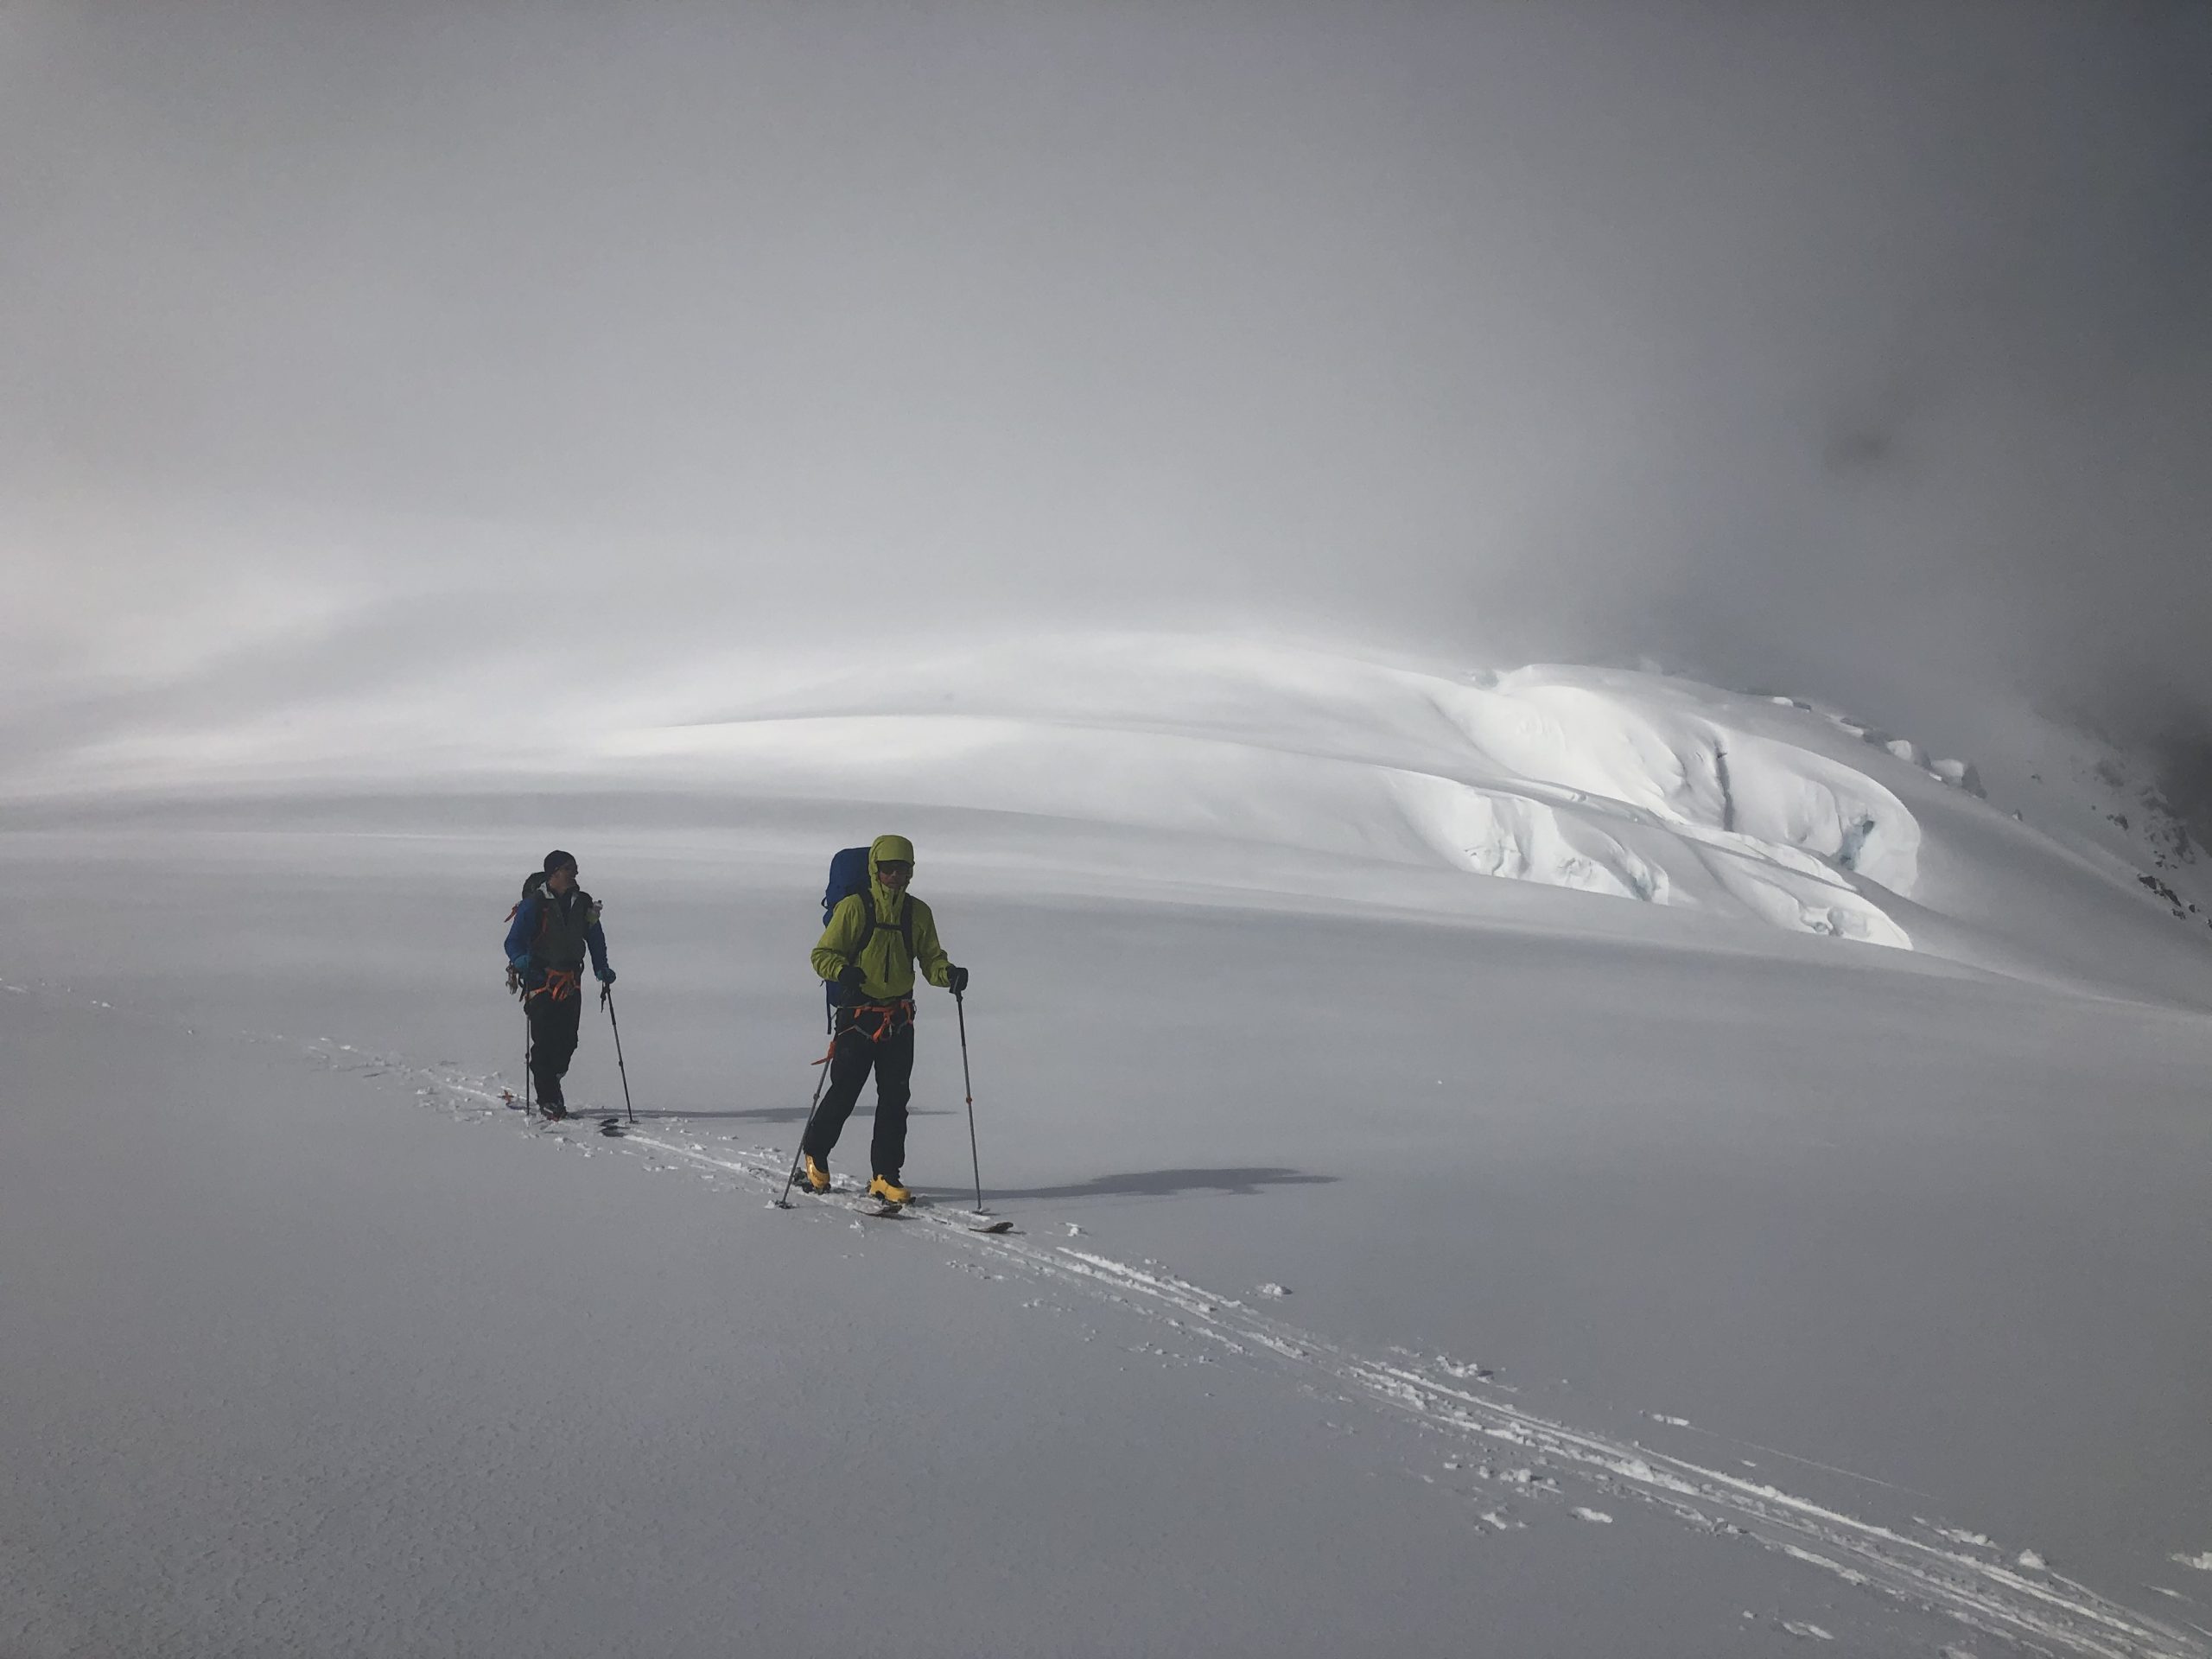
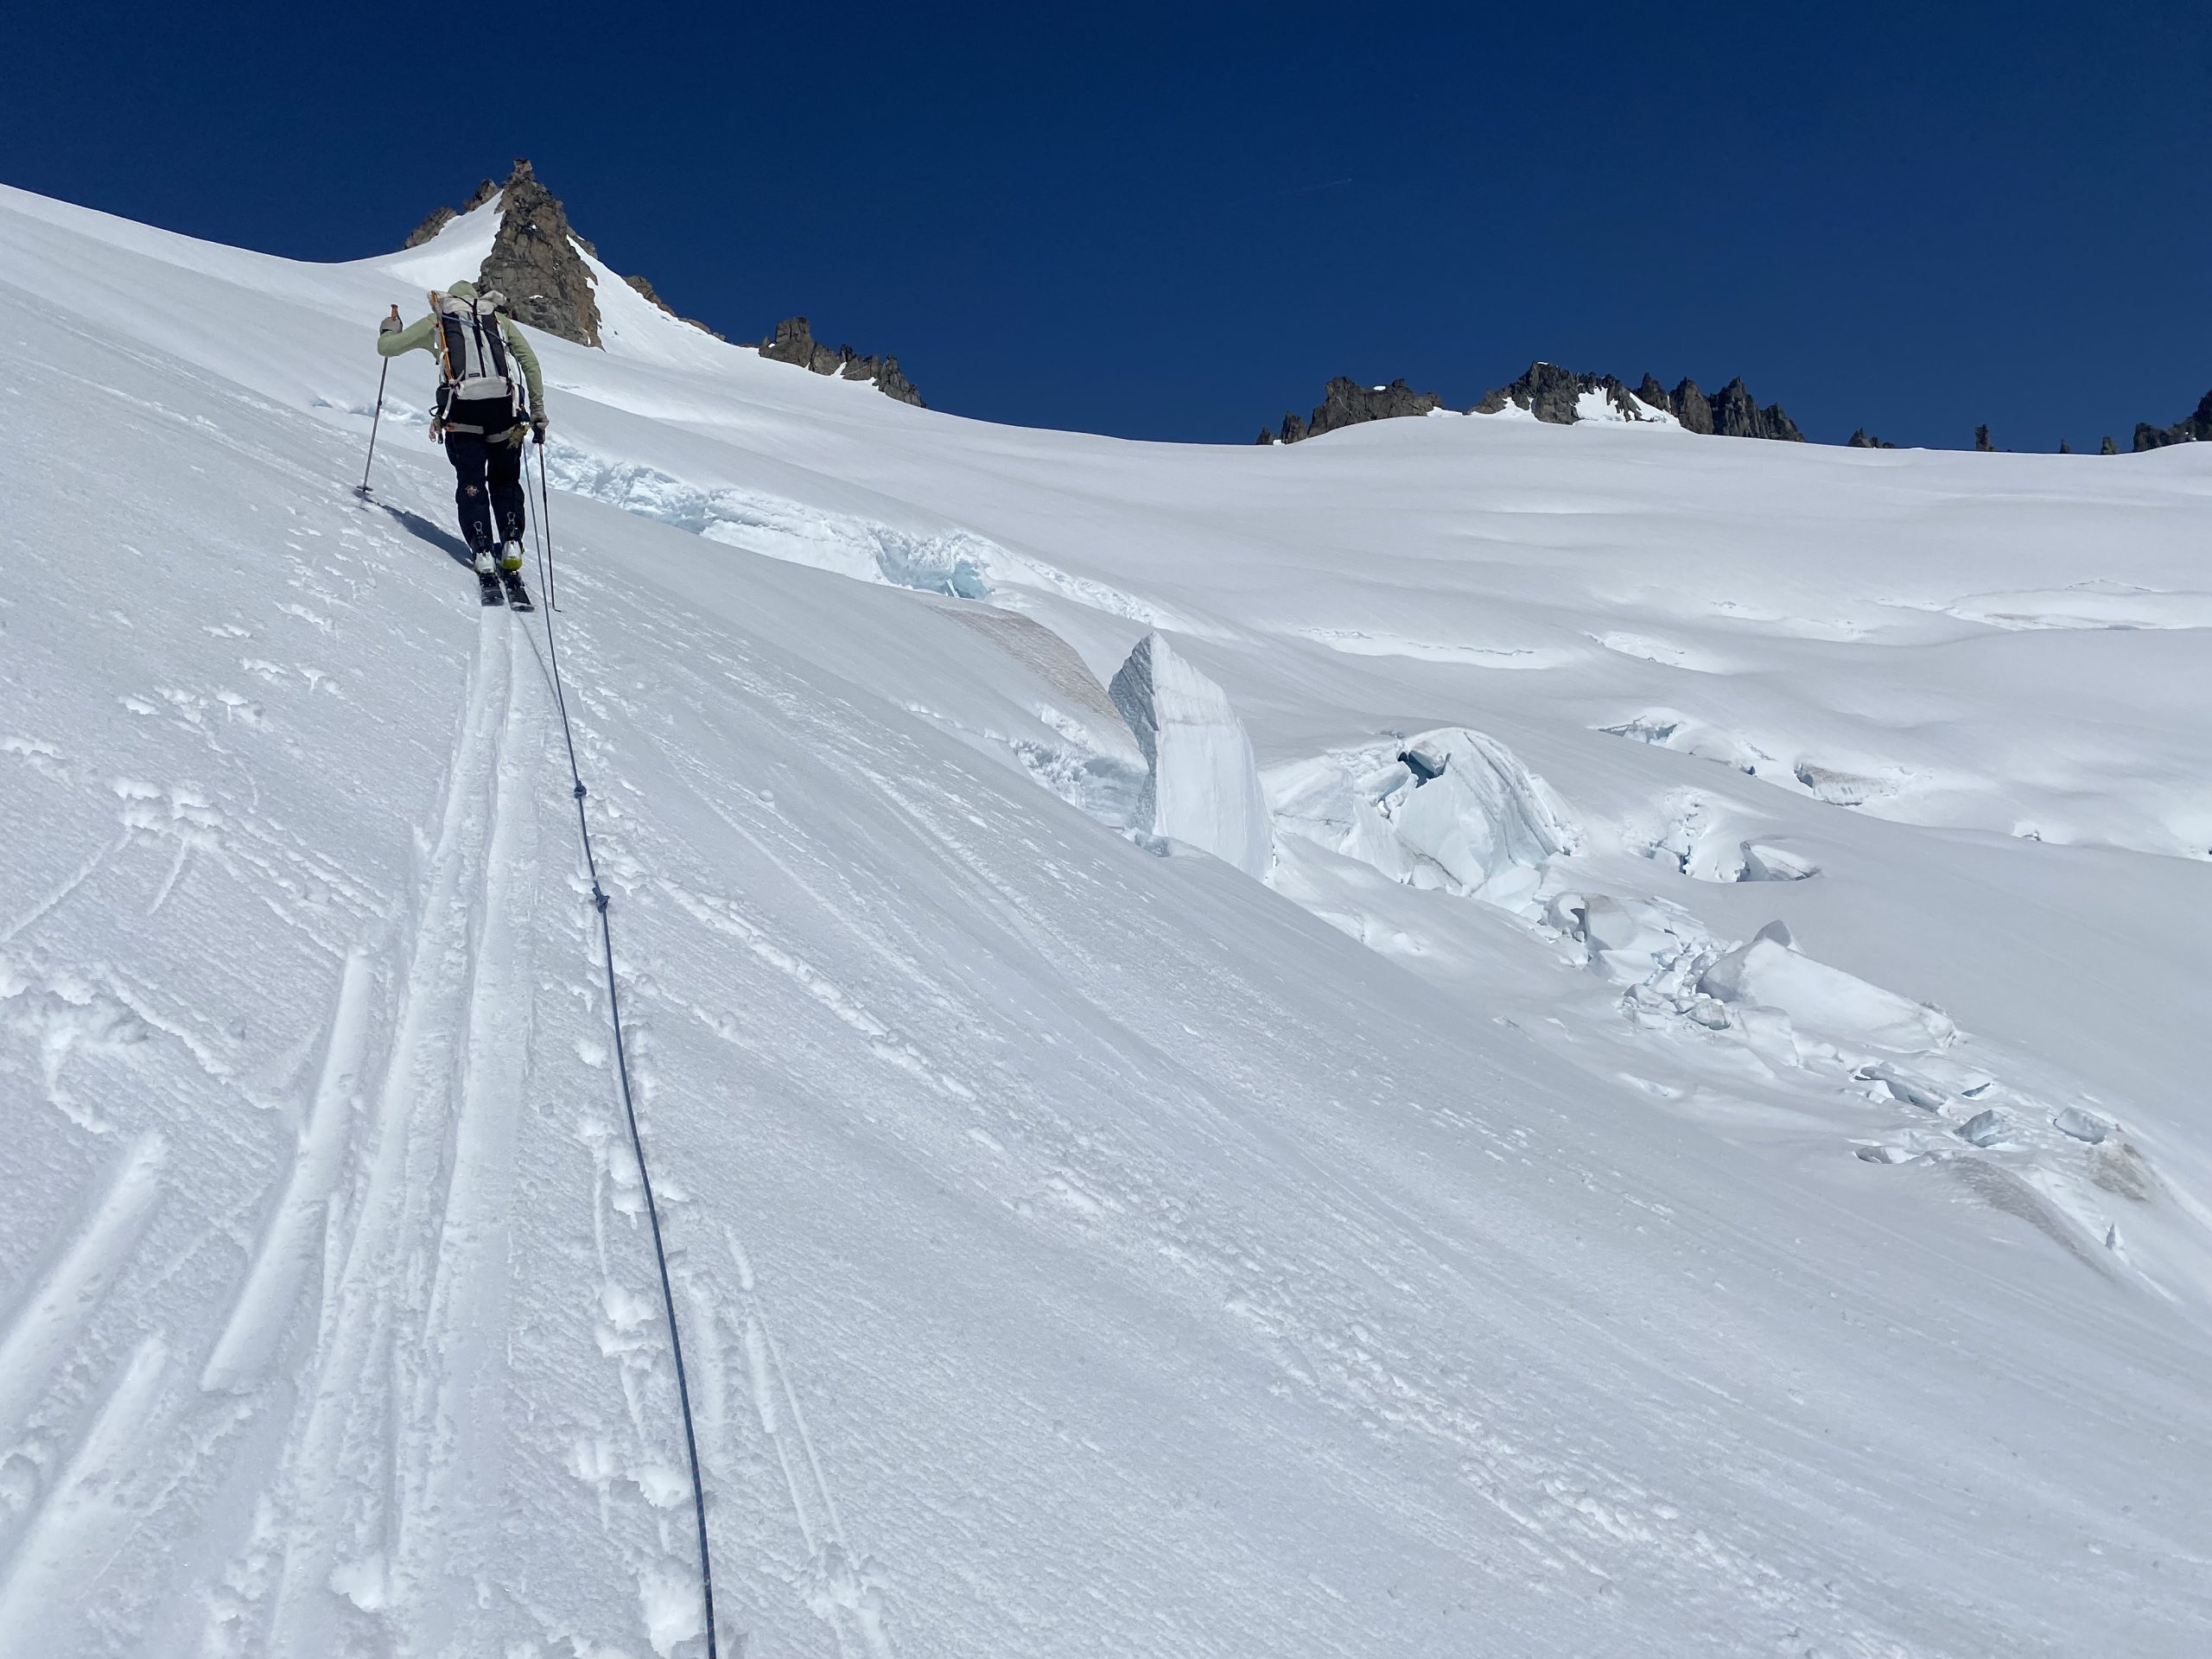
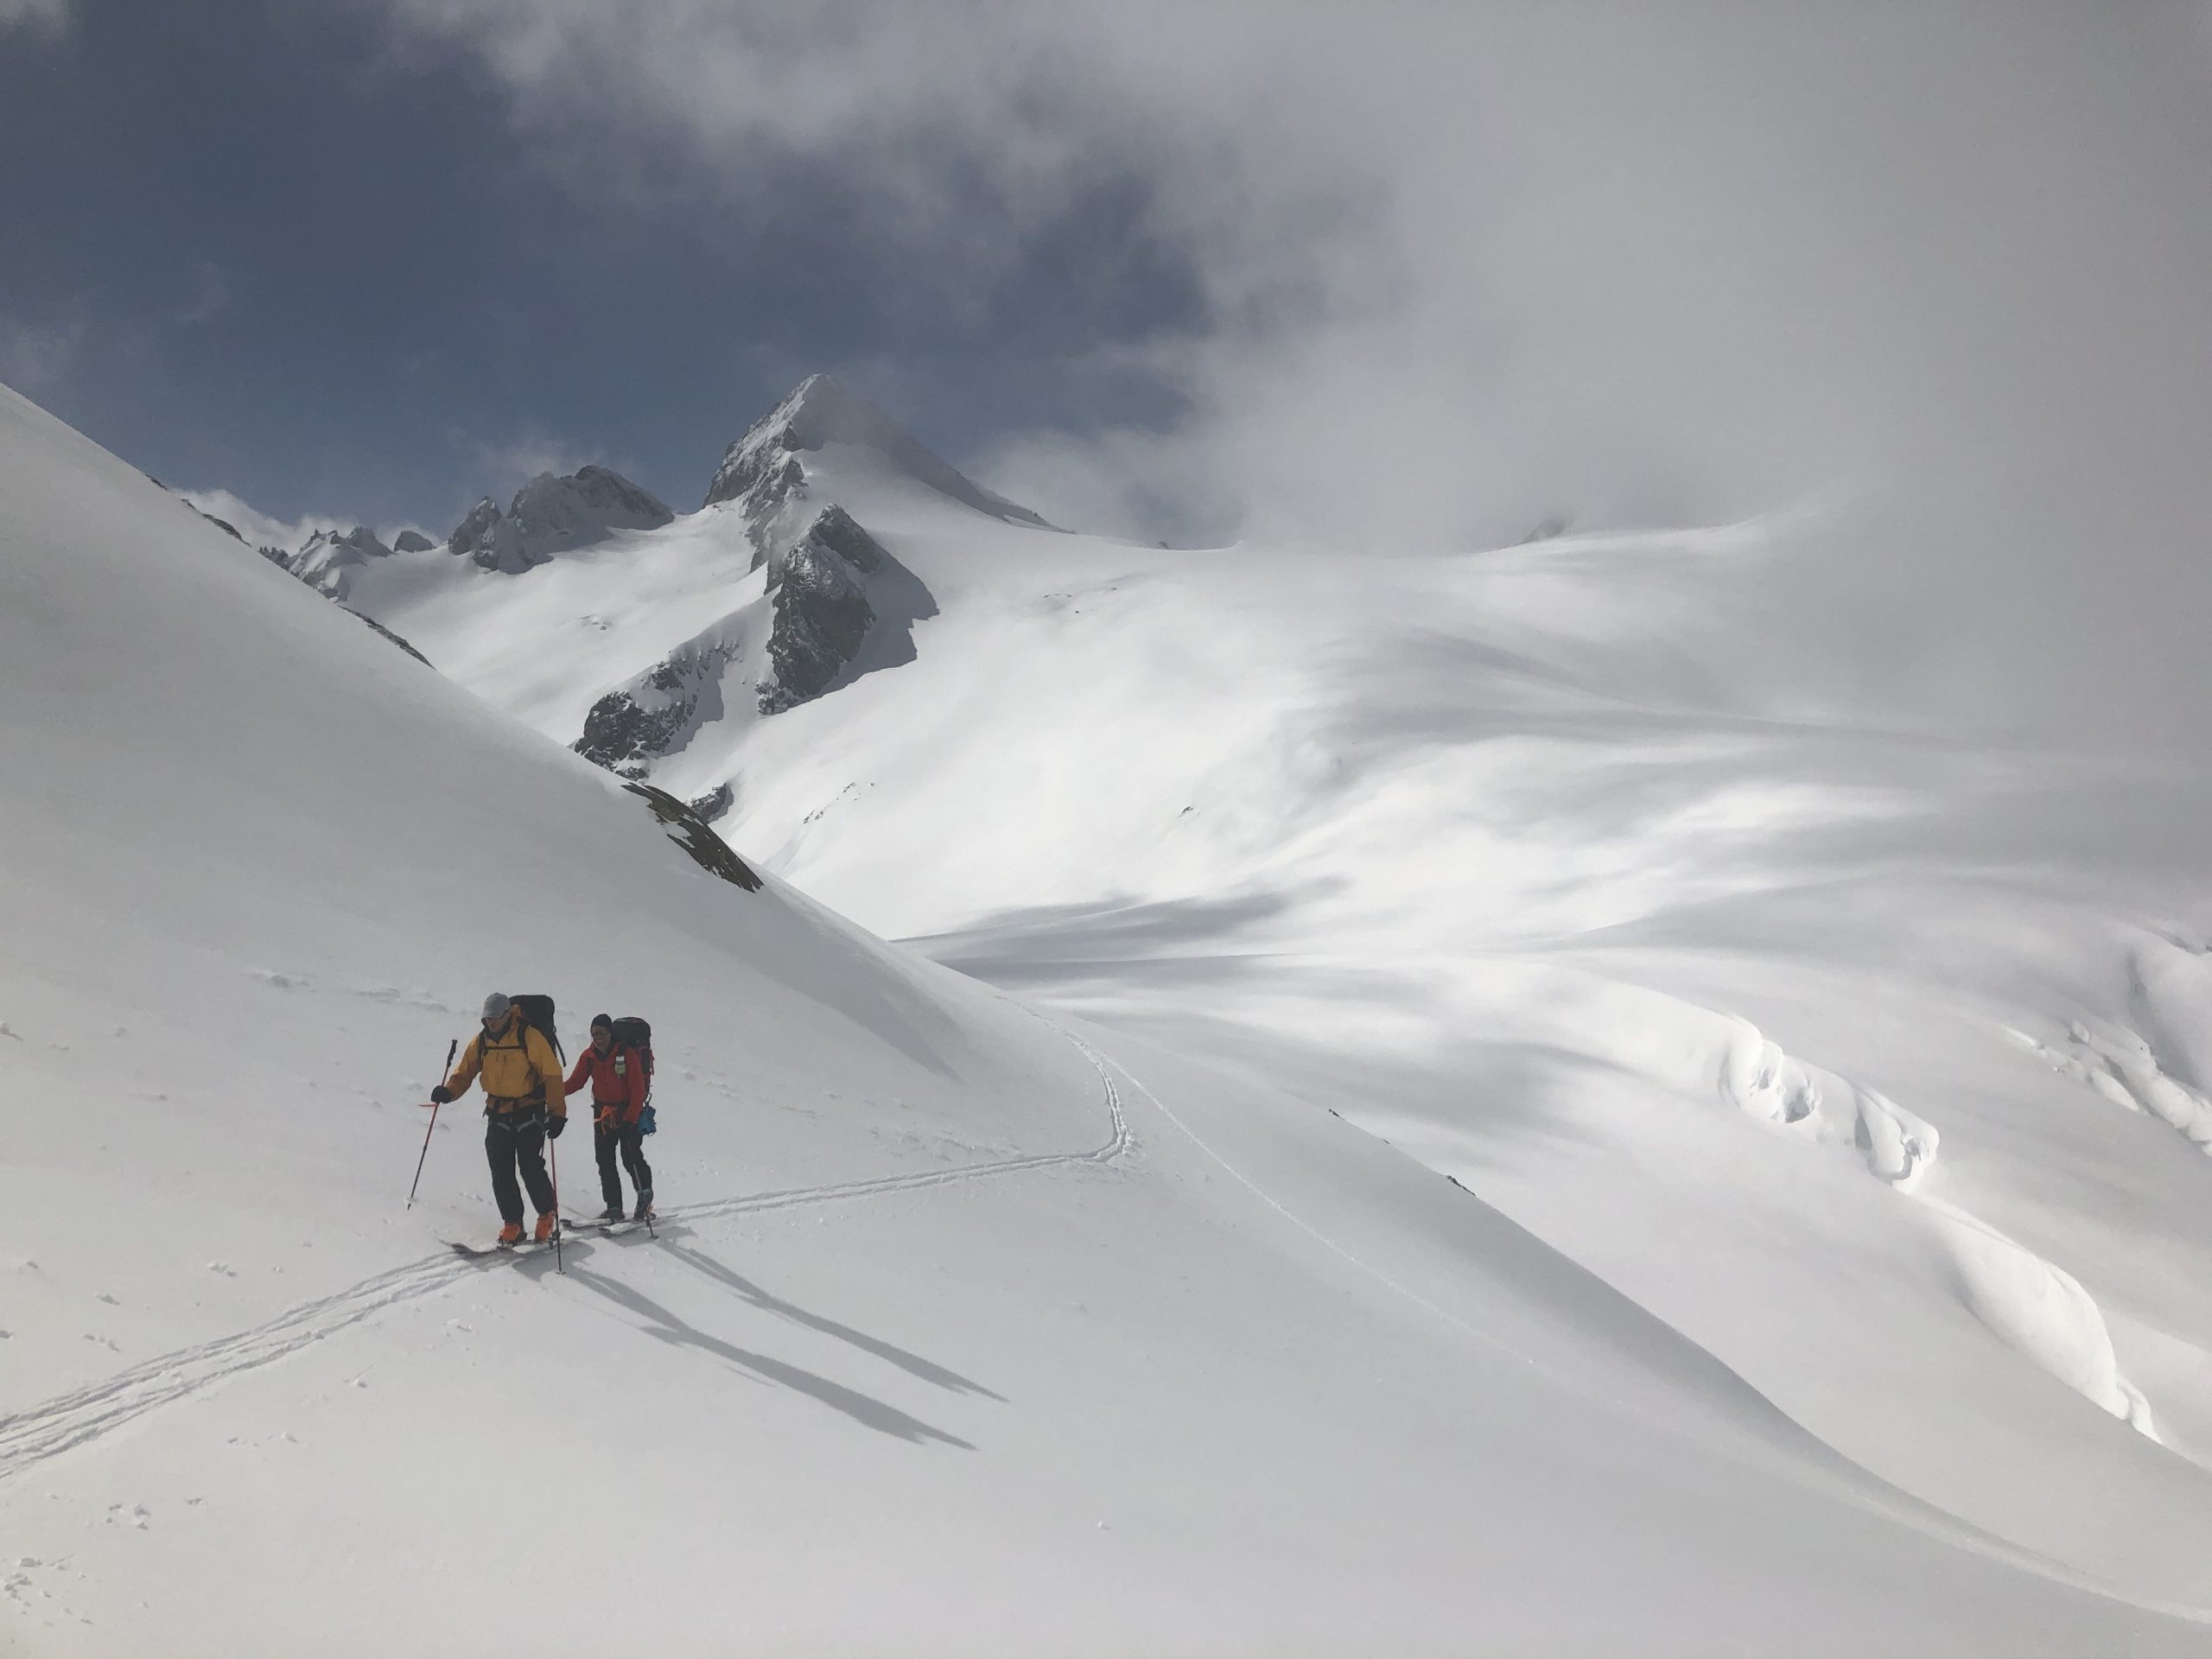
Day 3 – Traverse Backbone Ridge and the Backbone Glacier to the North Klawatti Area
2,500′↑ 2,500′↓ ~7 miles, 7–9 hours
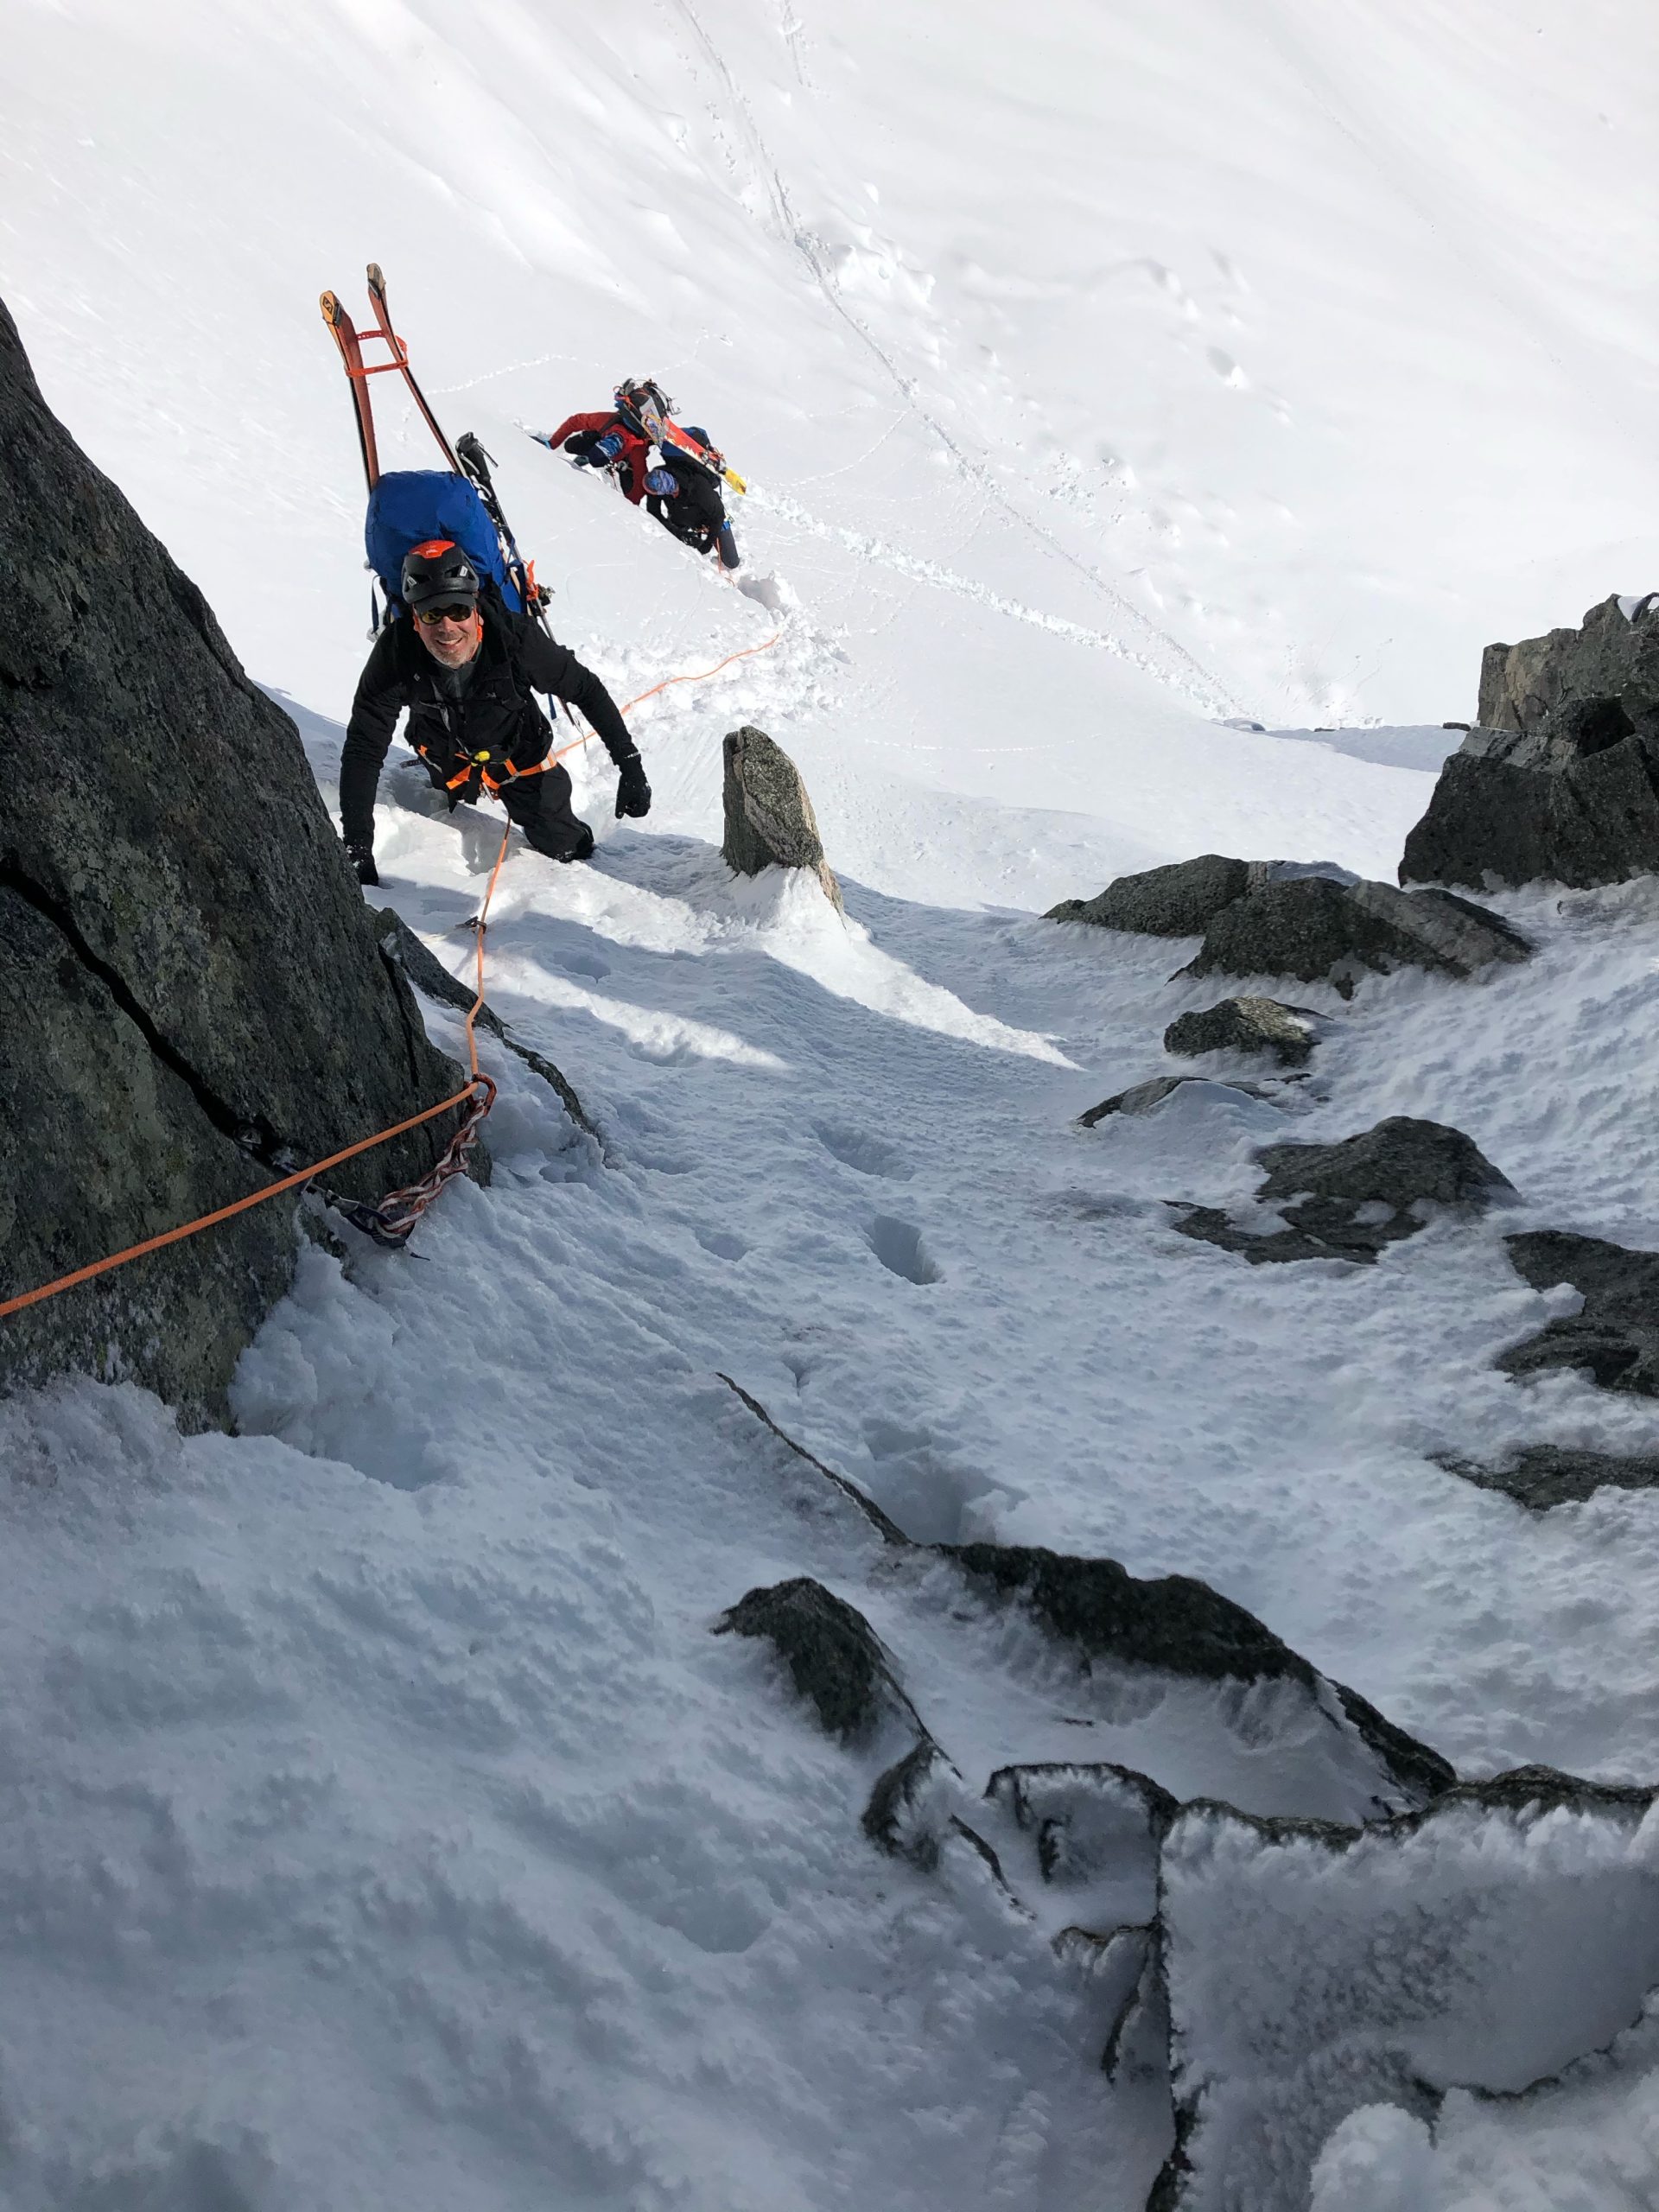
Continue your traverse across the Backbone Glacier and over a series of cols and ridgelines, including a crossing near Backbone Ridge and over the Klawatti Col (~8,000 ft). This is one of the most committing and scenic days, with incredible views in all directions. Descend onto the upper Neve Glacier and set up camp below Primus and Austera peaks or near the North Klawatti Glacier. Optional ski mountaineering side trips include Klawatti Peak or Austera.
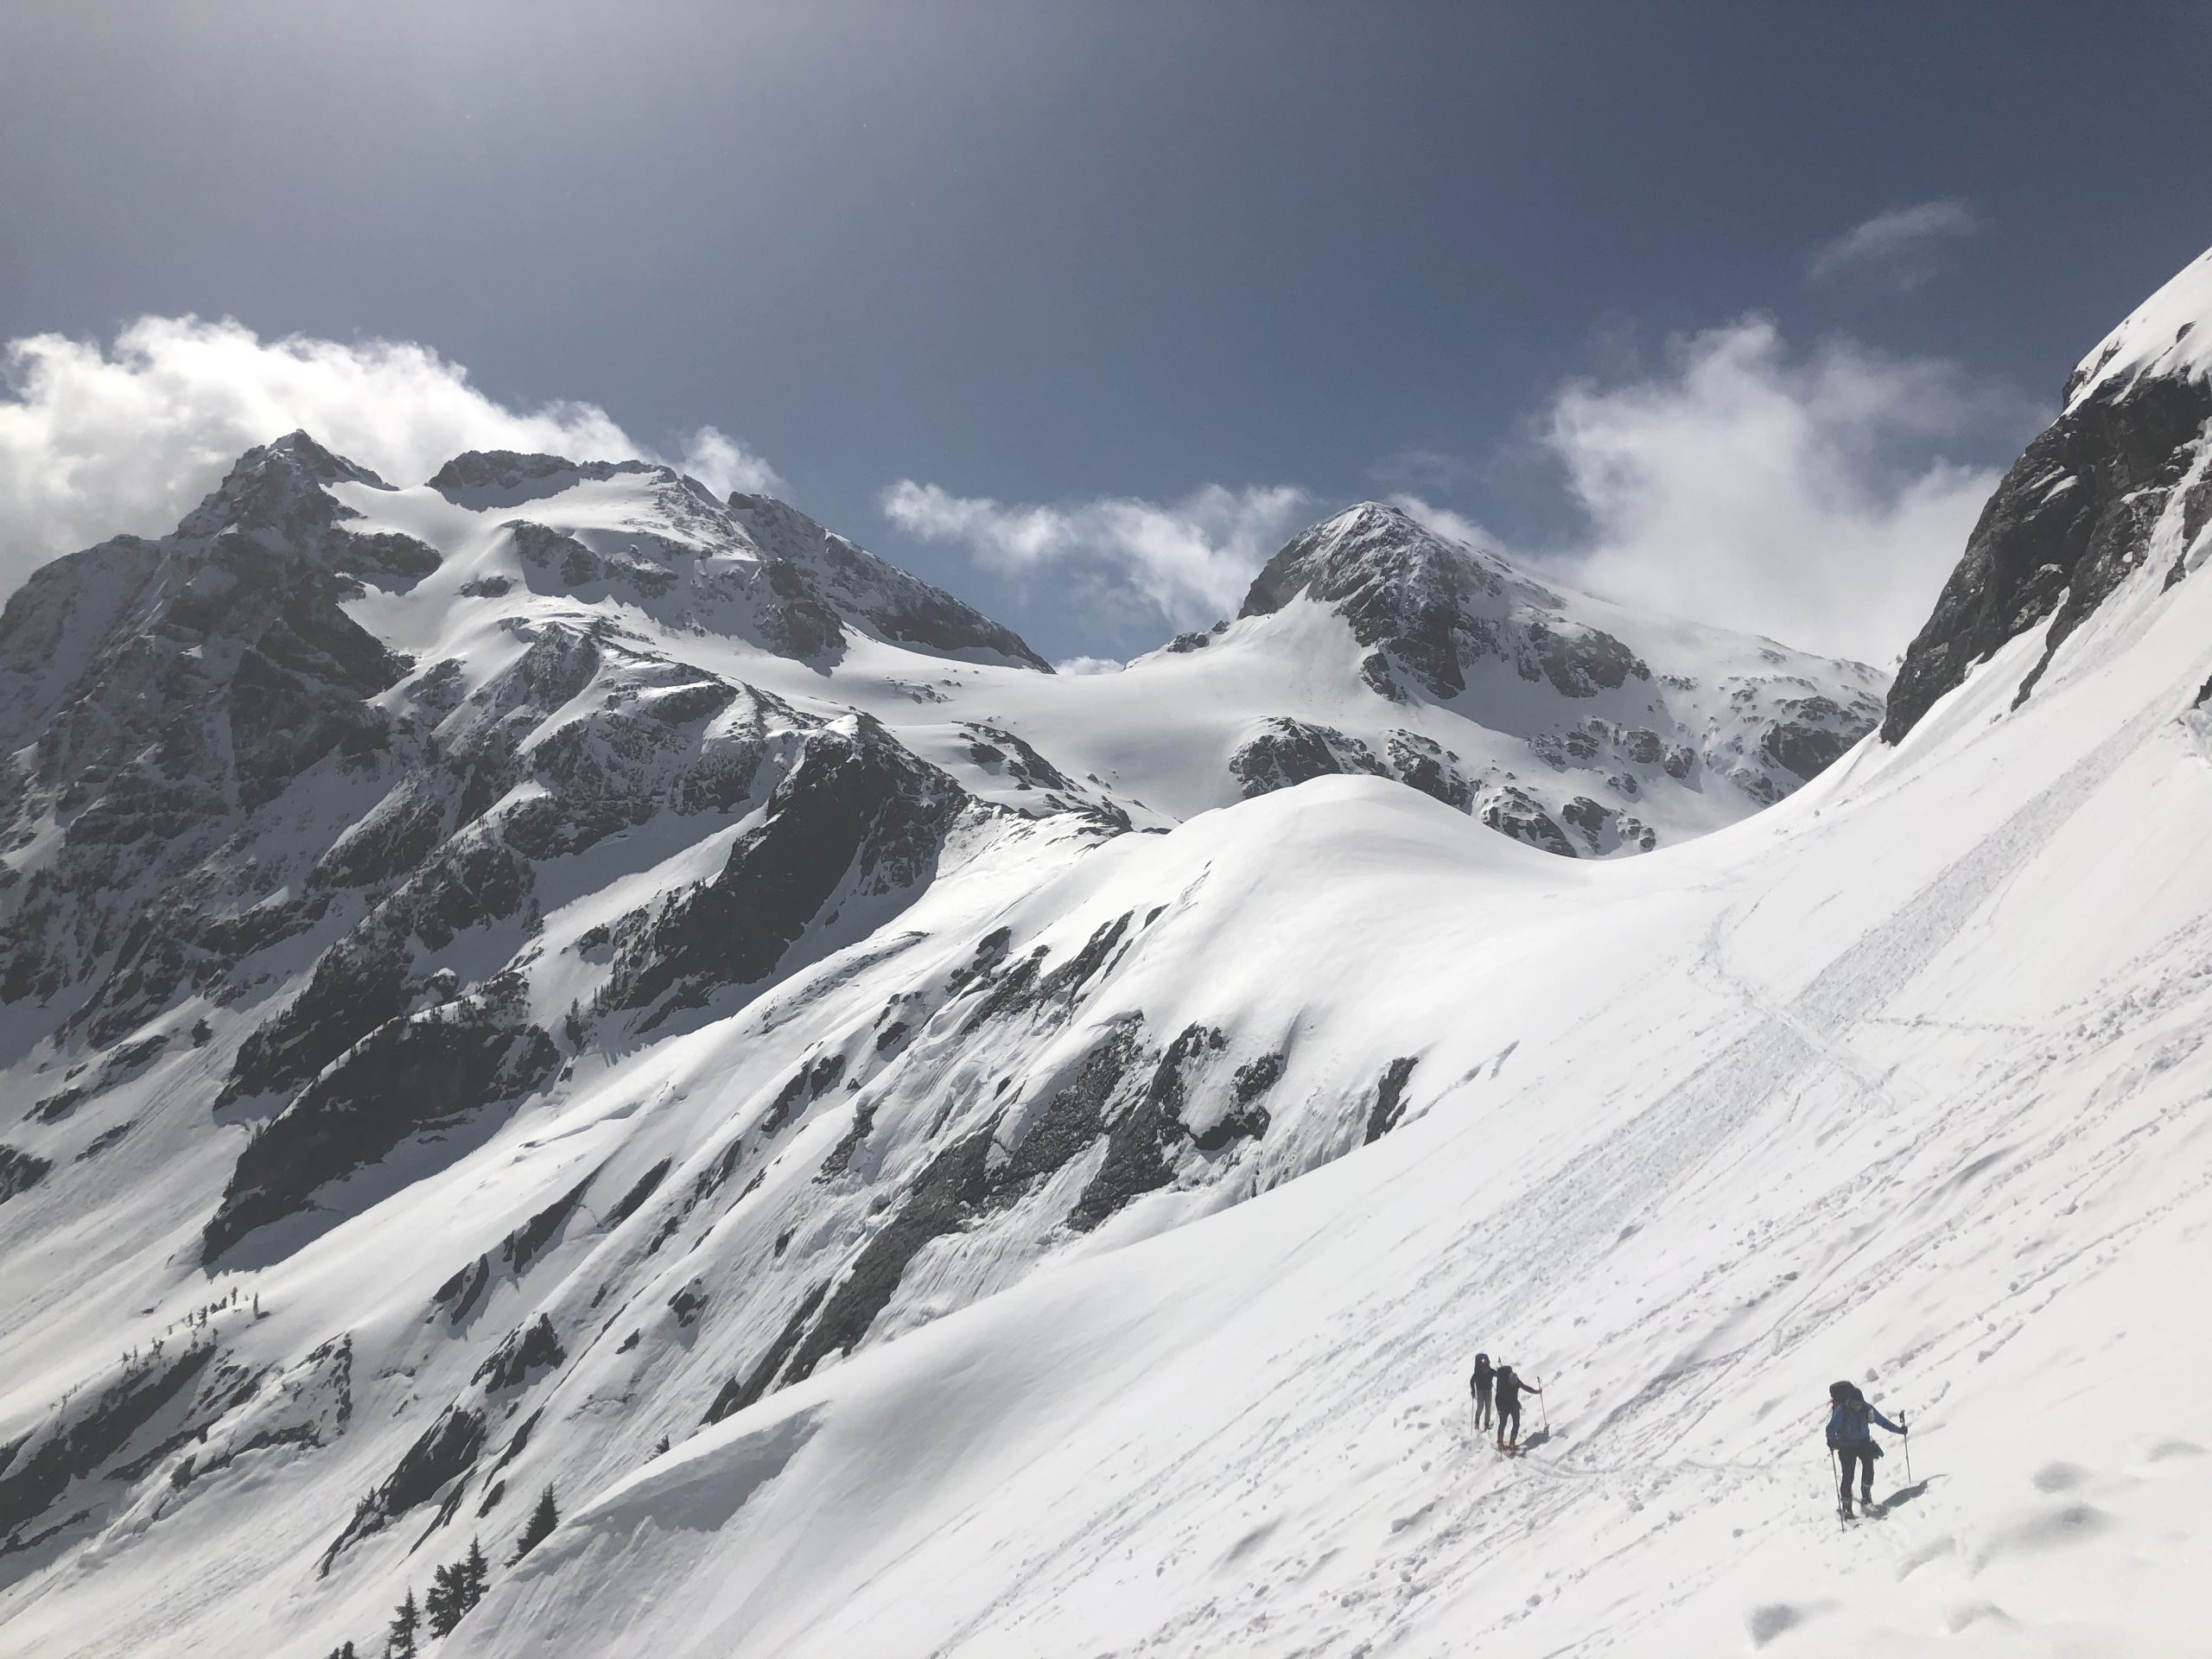
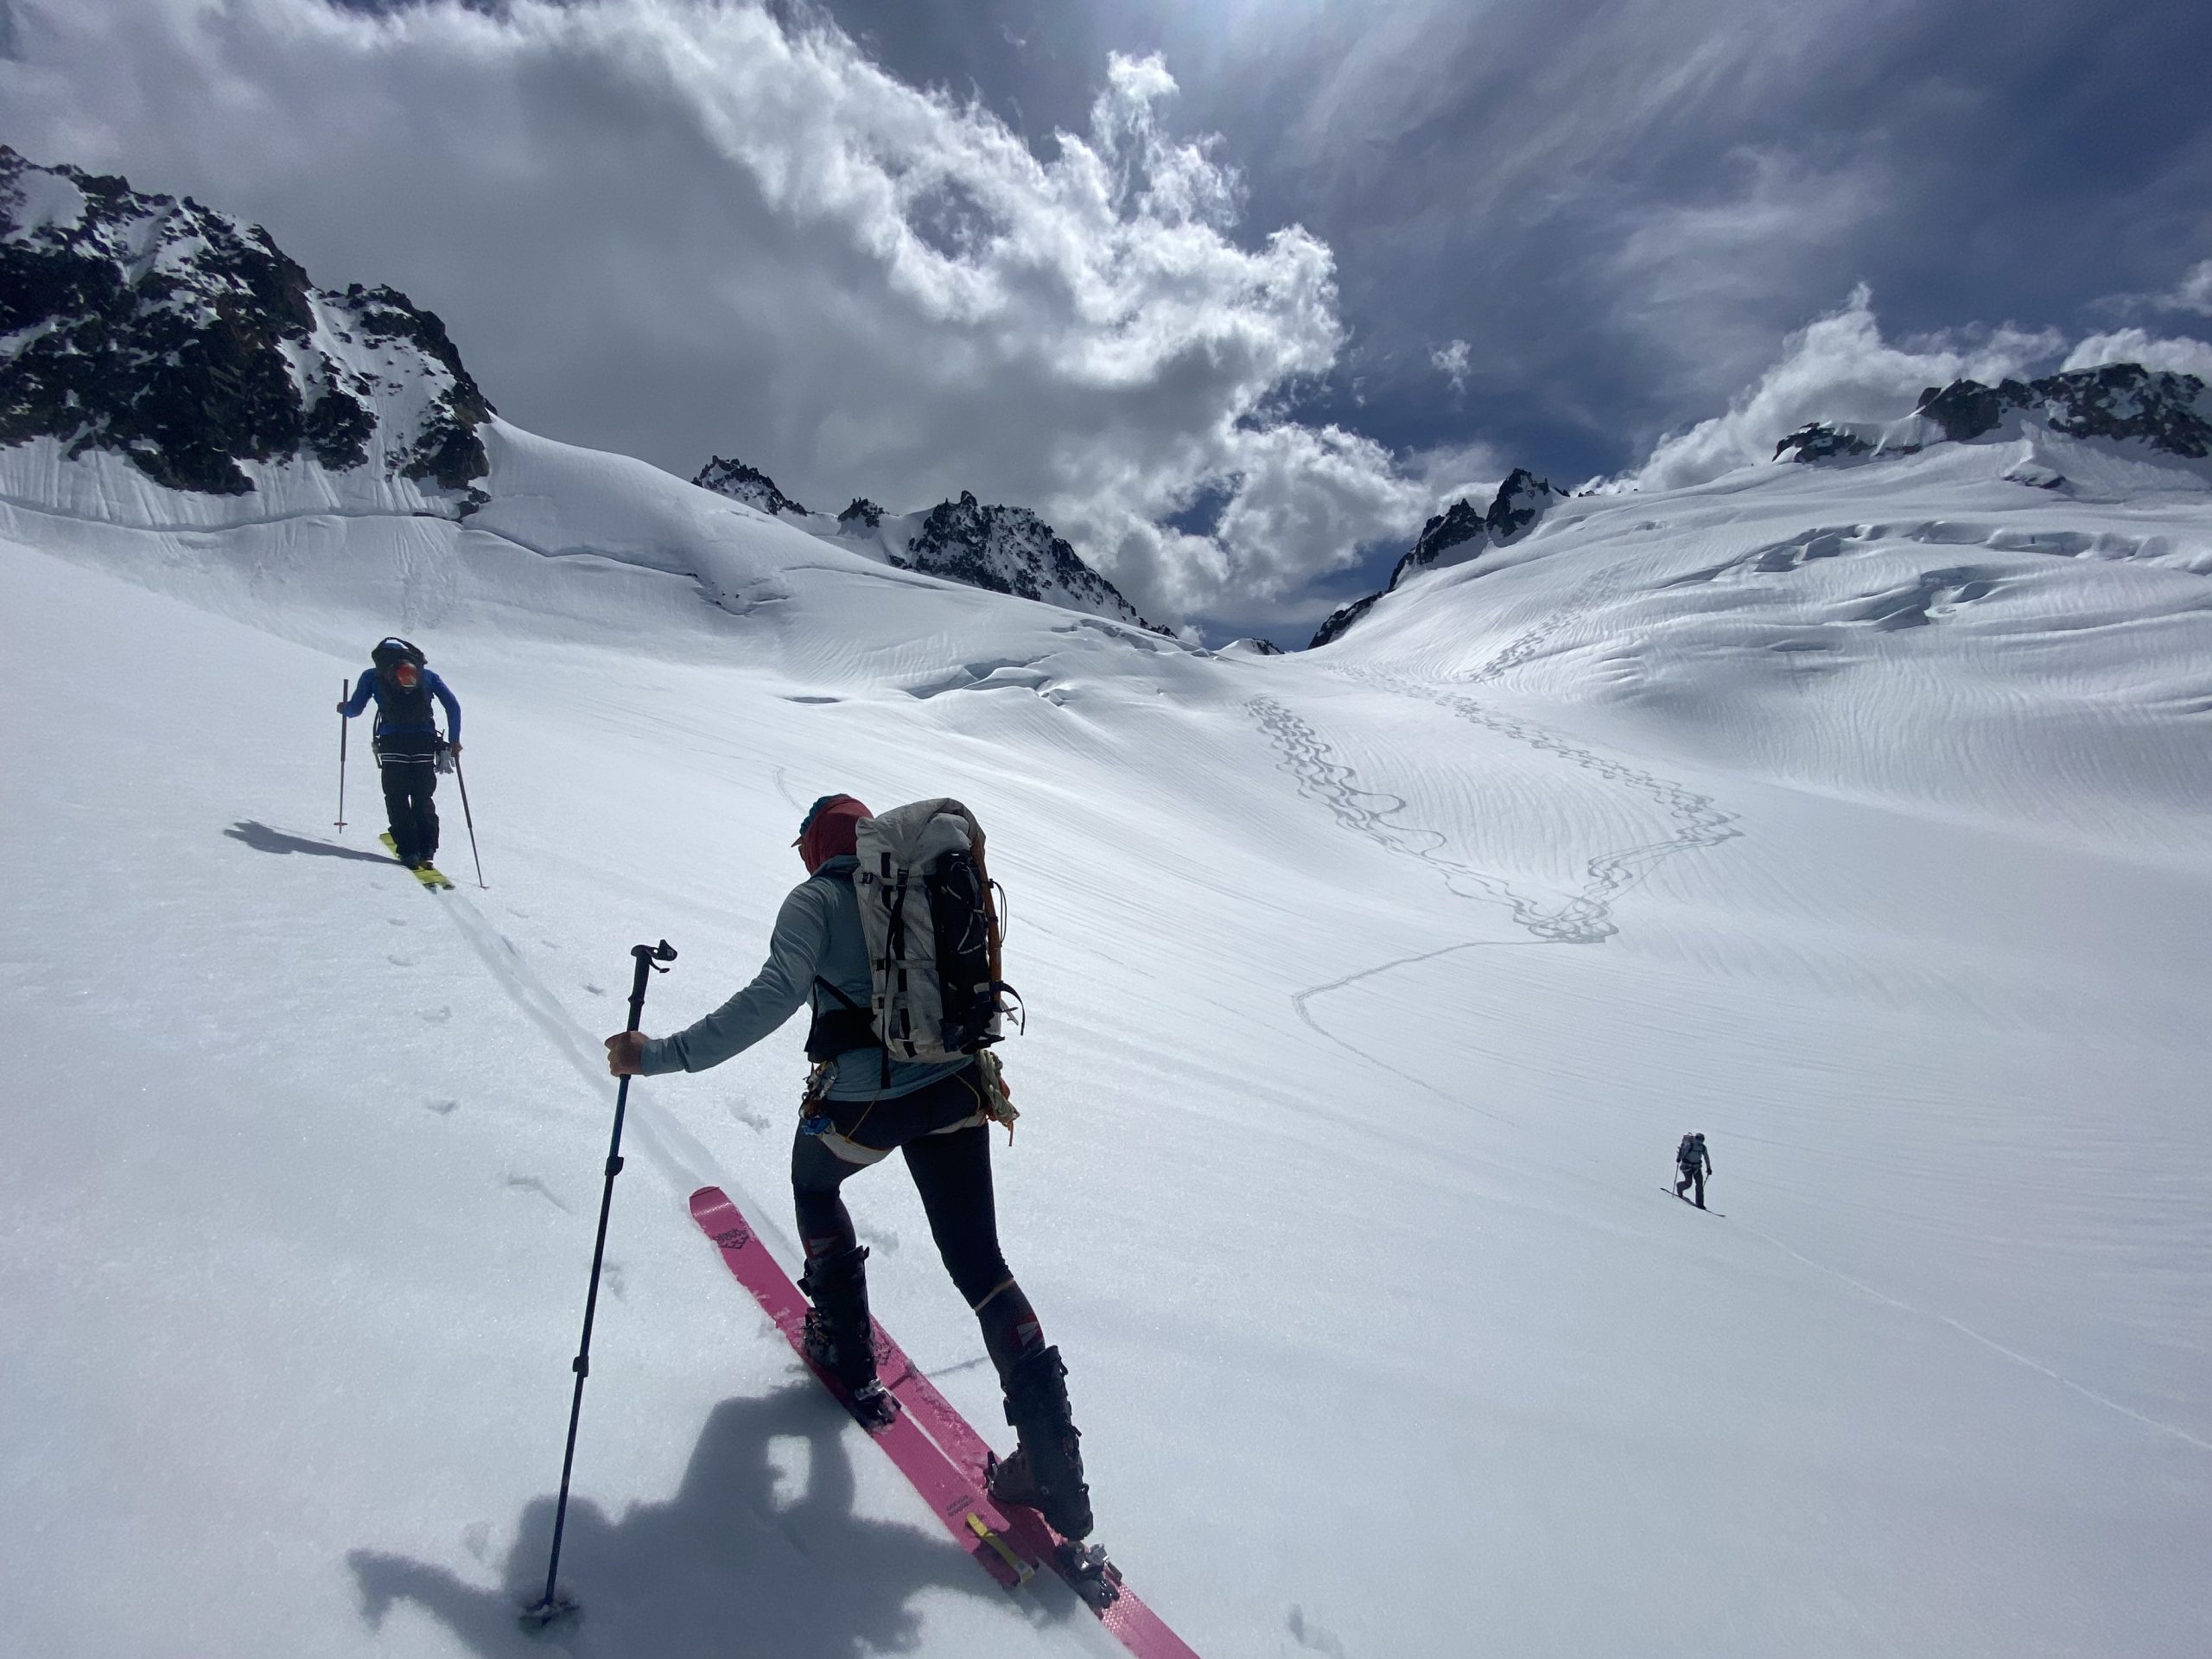
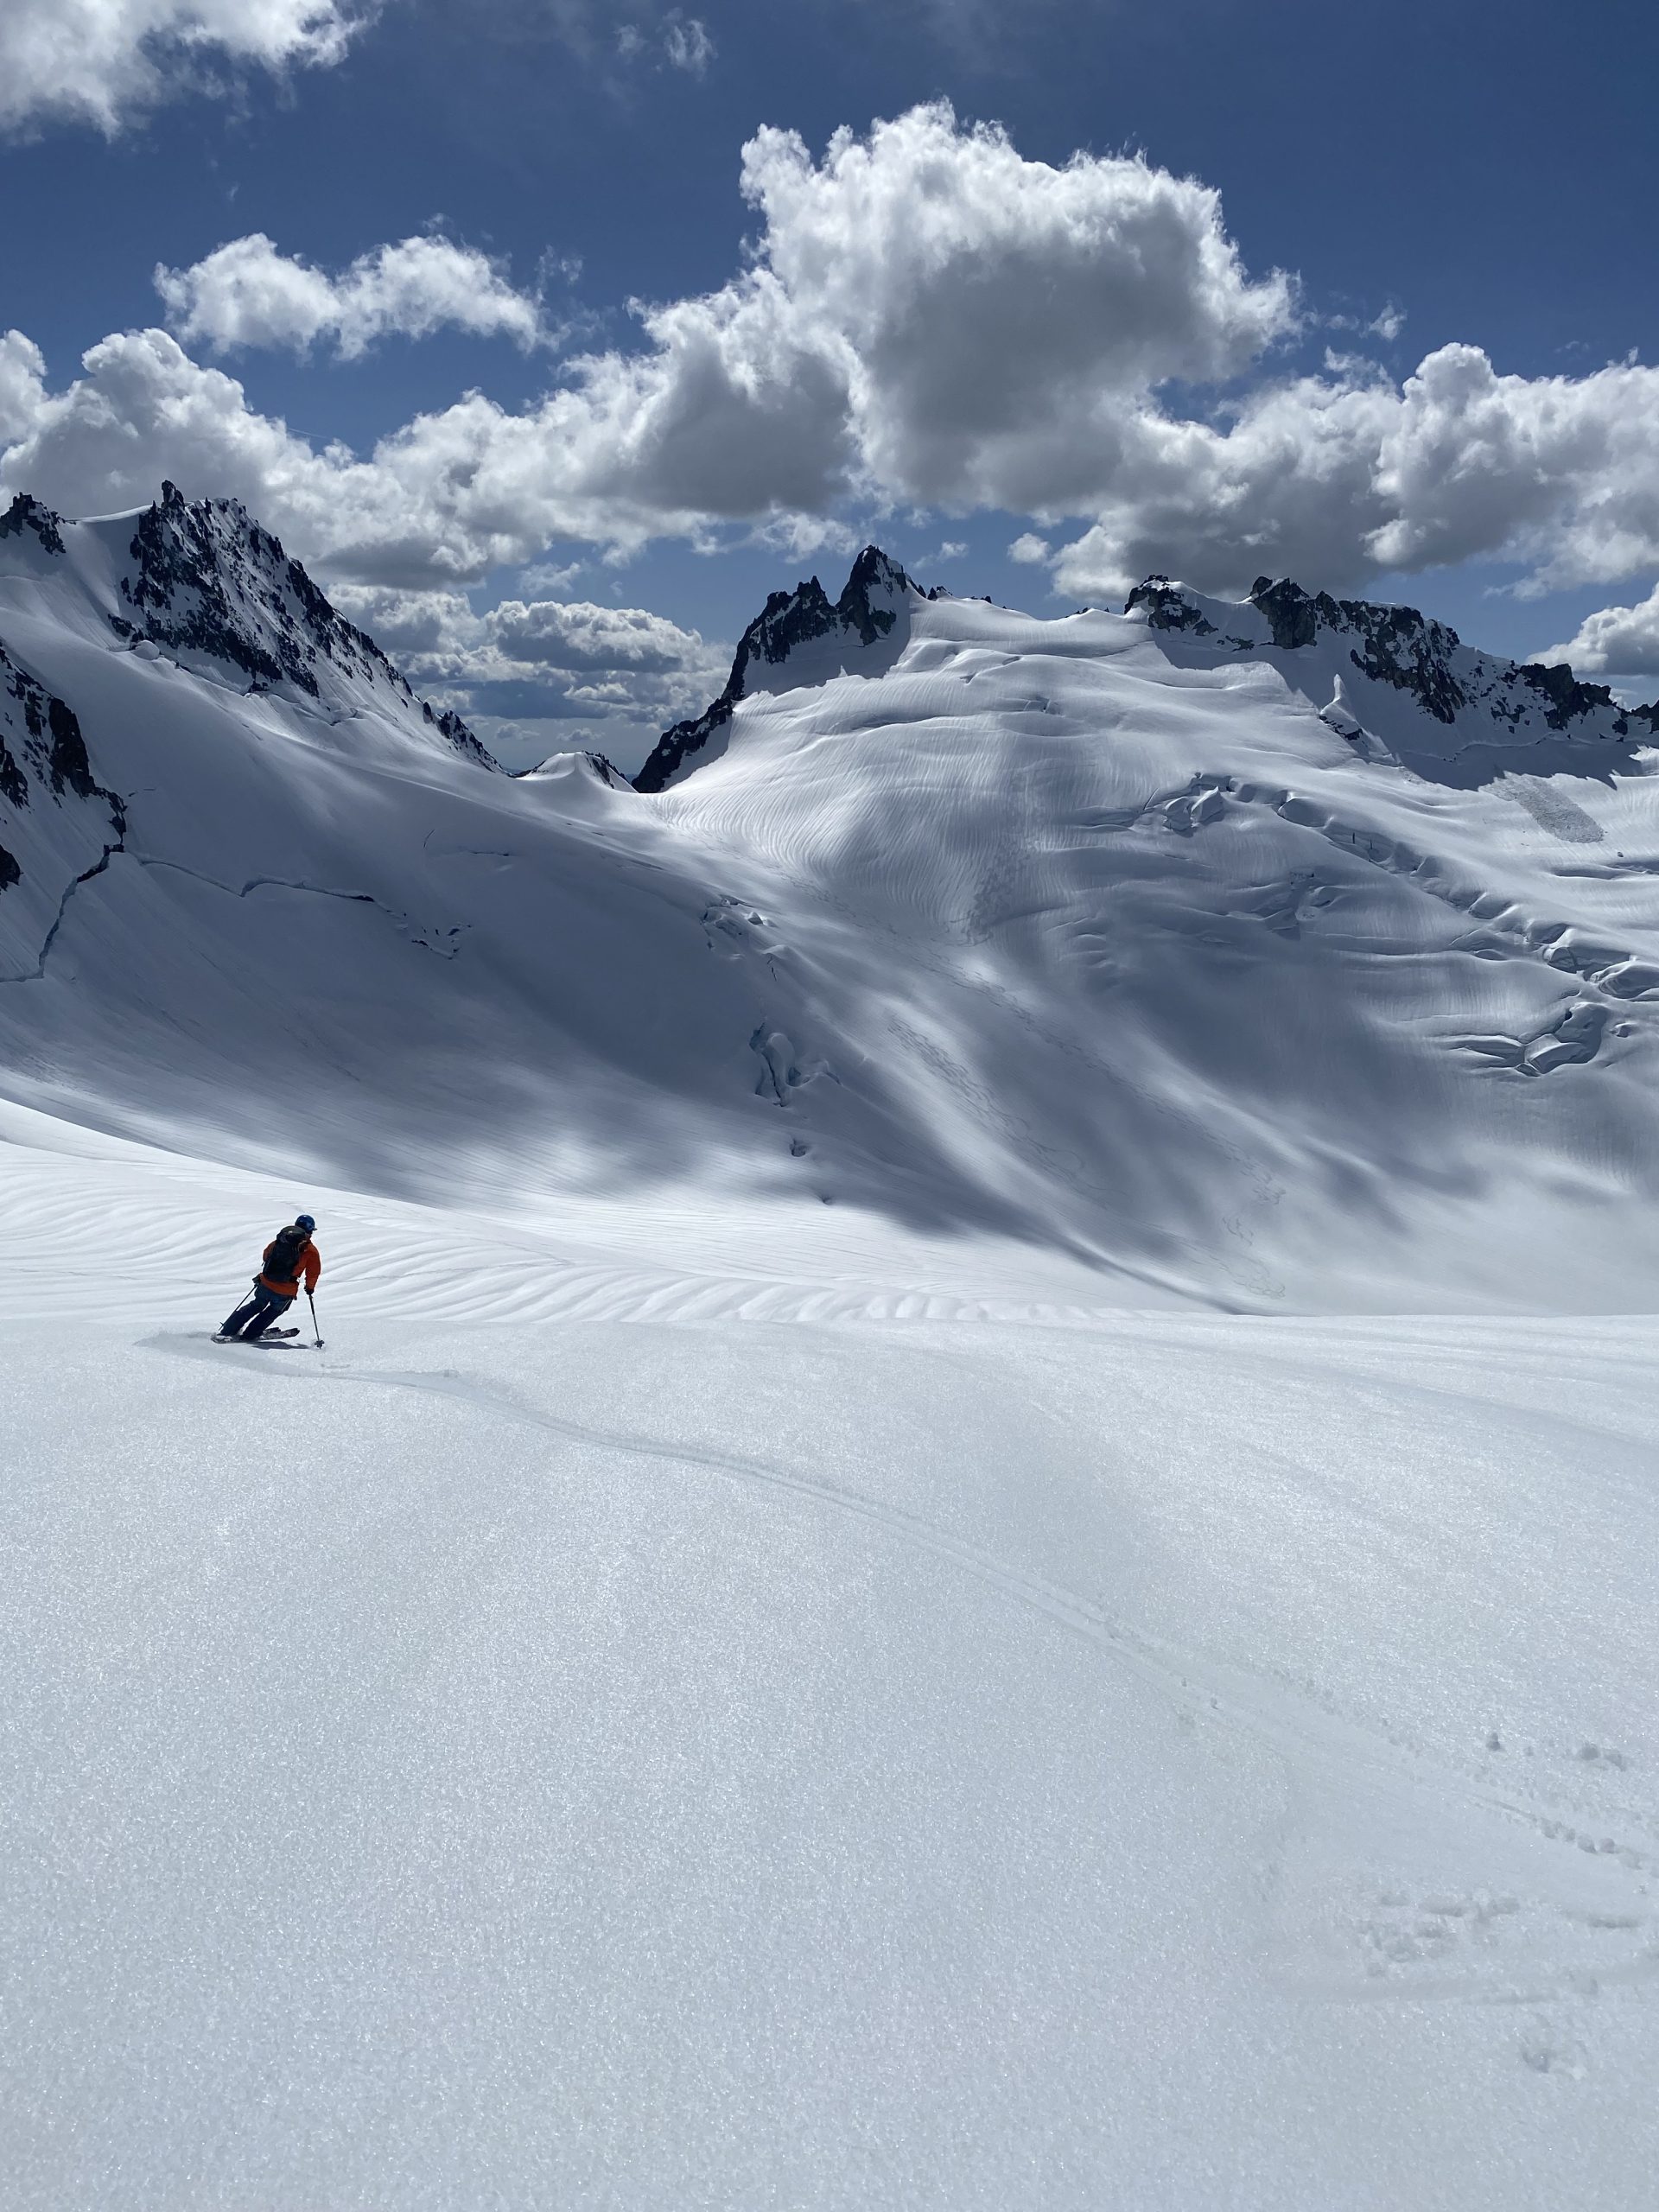
Day 4 – Ski the Neve Glacier to the Base of Snowfield Peak 1,500′↑ 2,500′↓ ~6 miles, 5–7 hours
A more relaxed day begins with a gentle descent down the Neve Glacier. Continue skinning around or over point 7,800 and across the southern reaches of the Neve, then gradually ascend to a camp near Snowfield Peak. Depending on timing and energy, an evening summit of Snowfield may be possible. Views from camp include the Picket Range, Colonial Peak, and the remote southern reaches of the North Cascades.
Day 5 – Climb Snowfield Peak and Descend to Pyramid Lake Trailhead 1,500′↑ 6,000′↓ ~10 miles, 6–9 hours
Begin the day with a climb to the summit of Snowfield Peak (~8,347 ft), which typically involves skinning and possibly booting the final slopes depending on conditions. From the summit, enjoy your final sweeping views of the entire traverse route. Descend the steep and sometimes tricky snow slopes below the Colonial Glacier, navigating moraine and forest as you make your way down to Pyramid Lake and the Pyramid Lake Trailhead (~2,200 ft), where a vehicle shuttle completes the traverse.
Our recommended clothing system has four layers.
- Base layer: manages moisture and wicks perspiration away from your skin. (Polypro, capilene, driclime)
- Softshell: should be a durable, comfortable, insulating and wind/water resistant layer that breathes well.
- Hard shell: windproof, waterproof and breathable. (e.g. Gore-Tex, or similar)
- Insulating layer: should be down-fill or synthetic-fill and fit over all layers. (e.g. down, primaloft or polarguard)
These four layers are usually sufficient for most people, but if you tend to be colder bring one extra medium-layer that would be ideal for extra warmth around camp, such as a vest. When deciding what to pack, remember to bring enough clothes and accessories to ensure your safety and comfort, while not over-burdening yourself with items you probably won’t use.
Climbing/Ski Gear
- Adjustable Ski poles with powder (big) baskets*
- Skis or splitboard.Skis should be equipped with alpine touring bindings or telemark bindings. We prefer splitboards w/ skins because you do not need snow shoes.
- Alpine touring, telemark, or snowboard boots
- Snowshoes for snowboarders
- Skins with glop stopper (skin wax)
- Avalanche Beacon This needs to be Triple Antenna.
- Shovel Small collapsible style
- Avalanche Probe 265cm or longer
- Helmet for riding and climbing adjustable to fit over hats
- Ski Crampons Required for all ski mountaineering trips
- Alpine climbing harness Must have adjustable leg loops and fit over all clothing and can be put on with ski boots
- Ice axe Lightweight
- Crampons with anti-ball plate * Must be fit to boots prior to trip,
Crevasse Rescue Equipment Kit*:
- 4 Locking carabiners Large, pear-shaped carabiner is best, screw gate type recommended
- 4 regular carabiners (e.g. small wire gate are recommended)
- 1 double length sling
- 1 single length sling
- 1 Cordelette 6 mil 18-20’(6-7 meters)
- 1 12” Prussik or Hollow Block*
- 1 Microtraxion & Tibloc*
Upper Body

- Lightweight base layer T-shirt
- 1 long sleeve Sun Hoodie or shirt Lightweight, light colored for sunny days
- Soft Shell
- 1 Down/synthetic jacket with hood
- 1 Hard shell jacket with hood Waterproof and breathable. roomy enough to fit over multiple layers.
- 1 pair liner gloves Thin wool or polypropylene
- Shell gloves or mitts
- Warm hat Wool or synthetic
- Balaclava or Buff
- Shade hat or baseball cap
Lower Body
- 2 pair heavy wool/synthetic socks Check boot fit with liner and wool socks on
- 1 pair lightweight long underwear Polypropylene or Capilene
- Soft shell pants
- Shell pants Waterproof/breathable with full side zips, Gore-Tex or equivalent is best
Sleeping Gear
- Sleeping bag Rated to at least 20º F. Line the stuff sack w/ plastic bag.
- Sleeping pad 1 closed cell foam and Air mattress/Neo-Air for extra warmth and comfort.
Backpack
- Internal frame pack 3500-4500 cubic inch capacity able to carry snowboard/skis
Miscellaneous Equipment
- Goggles and Sunglasses 100% UV protection
- Personal first aid repair kit Basics: moleskin/blister kit, Band-Aids, first-aid tape, ibuprofen, personal medications, spare parts for bindings and batteries etc.
- Lip balm At least SPF 20
- Sunscreen At least SPF 40
- Headlamp lightweight LED
- 2 water bottles 1 liter wide-mouth Nalgene and 1 bottle holster, or
- Hydration bladder With drinking tube and 1 Nalgene bottle
- Bowl and spoon Plastic, small Tupperware works well. Lexan spoons are best.
- Toiletry kit Be sure to include WAG Bag or toilet paper stored in a plastic bag.
- Bandana
- Hand wipes
- 1 small stainless steel thermos (Optional)
- Favorite snack foods (no more than 2 pounds)
WHO WILL MY GUIDE (OR GUIDES) BE?
We are small company who enjoy working together in the mountains as well as highly skilled professionals who hold current Wilderness First Responder certification and are proficient in technical rescue and evacuation skills. Our guides are dedicated to the world of alpinism, many having first ascents and hold professional certifications with the AMGA in the rock, alpine, and ski disciplines. The AMGA is part of the IFMGA, which is the international body of certified mountain guides.
HOW MUCH SHOULD I TIP MY GUIDES?
Tipping is considered standard practice in the guiding industry. Tipping amounts vary – so $20-30 per day per person/per guide is average that works well for the guides without a serious blow to your wallet. Often 10% of the course cost is a good rule-of-thumb. If you feel that the program was exceptional or substandard the tip can reflect that.
CAN I RENT EQUIPMENT FROM BCAG?
No, for these trips we strongly suggest to buy your equipment due to obscenely large rental costs for trip of this length.
HOW HEAVY WILL MY PACK BE?
Day trips will keep your pack between 10-15 pounds max.
WHEN DO I NEED TO PAY THE BALANCE OF MY TRIP?
For Scheduled Domestic Courses and Climbs: Your balance is due 60 days from trip departure. Payable by check, Credit Card with service charge or Venmo.
WHAT HAPPENS IF I NEED TO CANCEL MY TRIP?
If you should decide to cancel your trip, BCAG must be notified in writing. Your trip will be cancelled from the date we receive written notice. You will be assessed a cancellation fee according to the following schedule:
90 to 31 days from trip departure – 50% of trip cost
30 days or less – 100% of trip cost
WHAT HAPPENS IF BC ADVENTURE GUIDES HAS TO CANCEL MY TRIP?
In the rare circumstance where we need to cancel a program you can reschedule without a fee or receive a refund on your deposit. If circumstances arise that force us to cancel a program that is already in progress, we reserve the right to decide whether a refund or credit, at a prorated rate, will be issued. We are not responsible for cancellation fees or costs arising from your changed or cancelled flights, lodging, or other arrangements. We strongly recommend obtaining trip cancellation insurance from your travel agent.